For some time now, LabsLand has had an interesting physics remote laboratory dedicated to pendular movement. In this laboratory, students can access a real simple pendulum. They can choose certain parameters, such as the angle from which they want to launch the pendulum, just as they would if they had the pendulum in front of them.
The pendulum laboratory is very popular for physics classes in many schools, and even in introductory university courses. It is relatively easy to use and allows a wide range of activities of different difficulties. From some simple ones aimed at introducing students to pendular movement, to some much more complicated such as data analysis or analysis of energy losses due to friction in real non-theoretical pendulums.
Now, we have updated the laboratory to make it even better: simpler and more convenient to use, more complete, and with more possibilities
Simple Pendulum
There are various types of pendulum. There is the simple pendulum, the composite pendulum, the torsion pendulum, and many others. Probably the most basic and most frequent in physics classes is the simple pendulum. The simple pendulum is basically a certain mass suspended from a fixed point by a weightless wire. In reality, it is not possible to build a pendulum with these characteristics. In fact, the simple pendulum is also known as a mathematical pendulum or ideal pendulum.
The remote pendulum that LabsLand provides is not a simple pendulum as such, but it is a reasonable approximation. It is, therefore, a very suitable pendulum to introduce pendular movement.
The original laboratory
The original LabsLand pendulum laboratory allows you to experiment with the remote simple pendulum. It allows you to choose an angle, launch the pendulum, observe the resulting graph and use it to perform calculations, download the data in various formats, including Excel, to analyze it in more detail. It also has a stopwatch, which can be used to take manual samples of time.
The improved version of the laboratory
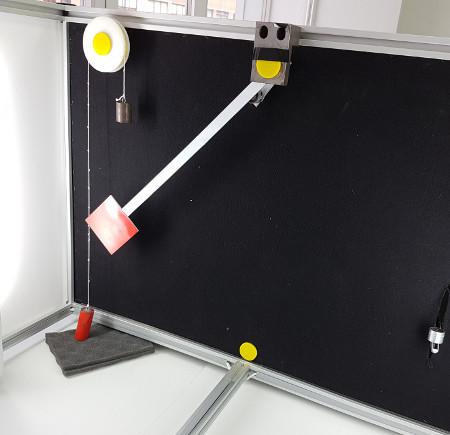
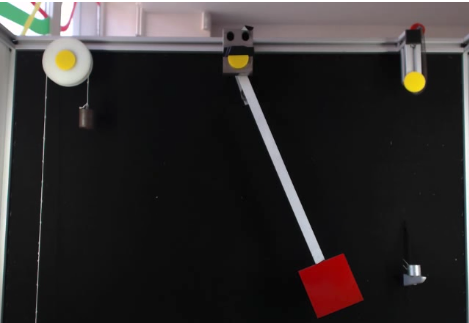
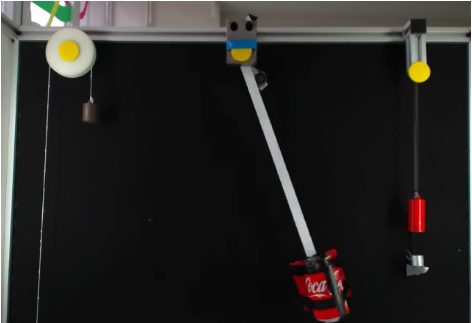
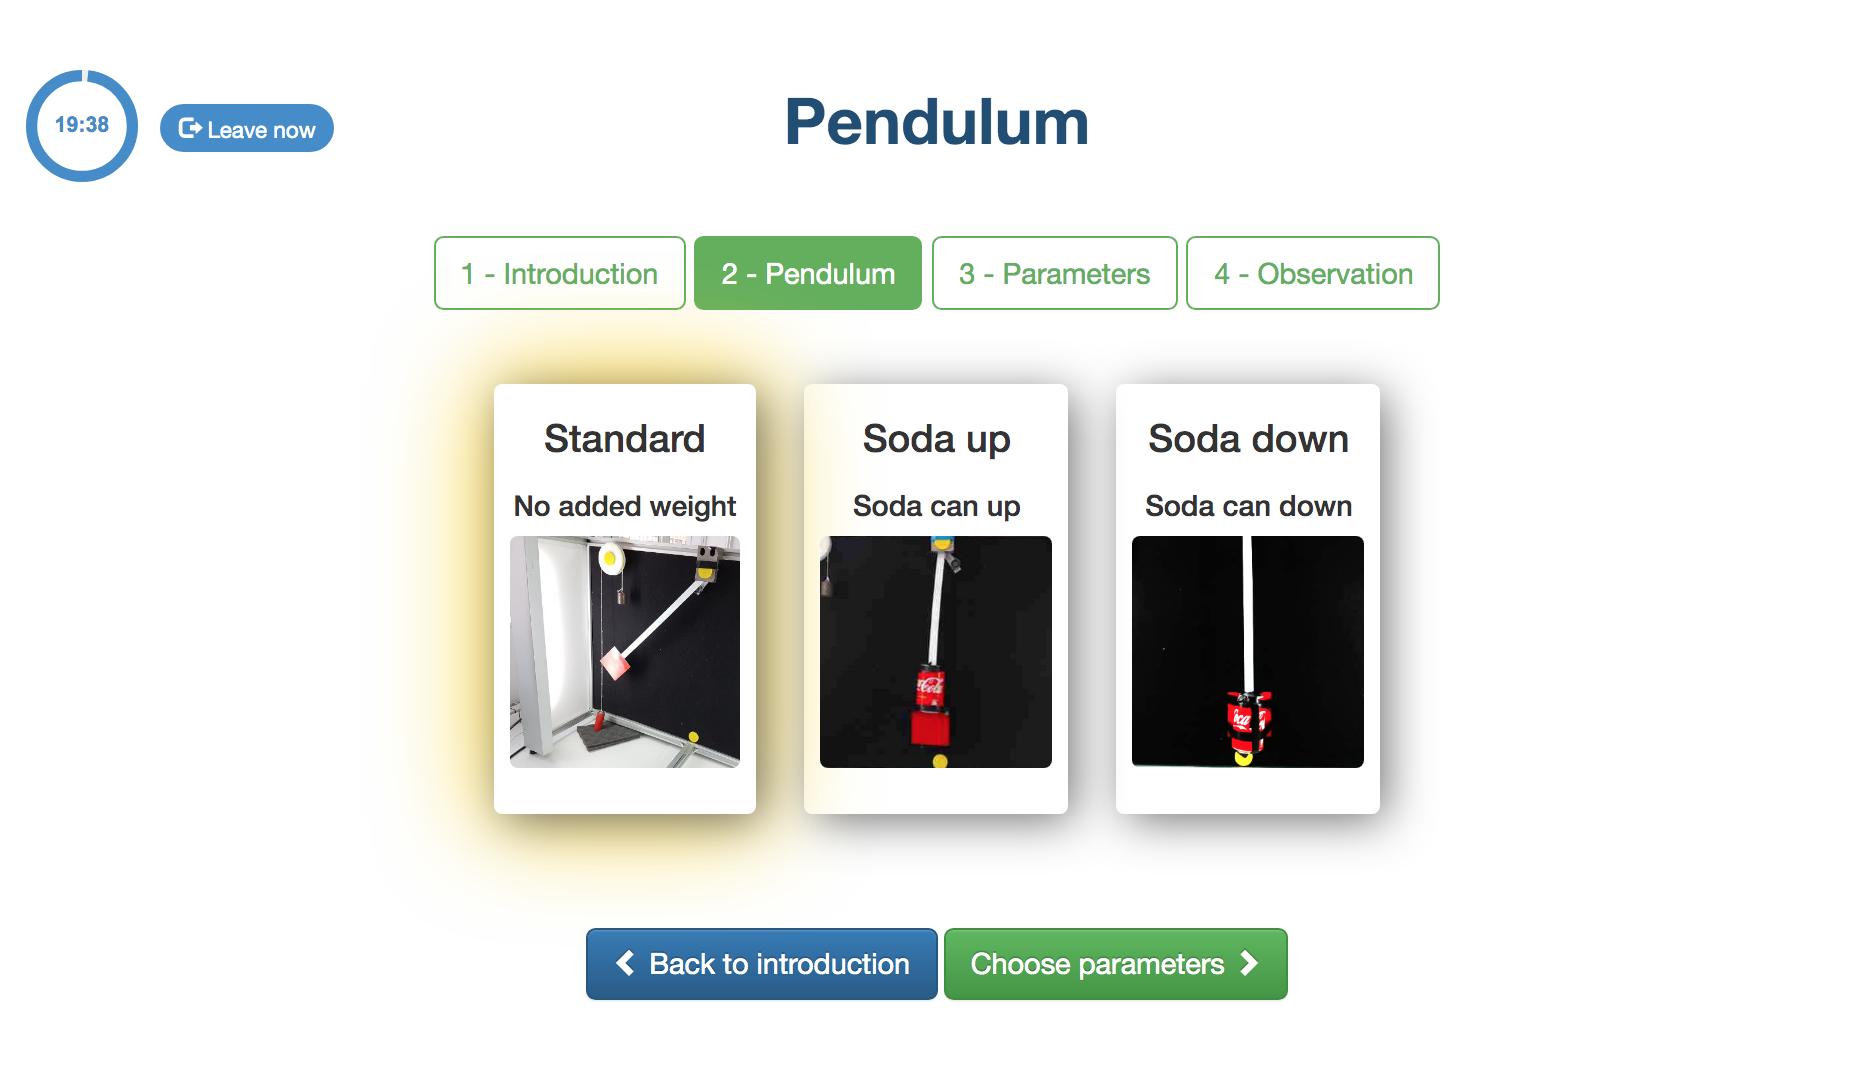
The new updated version of the laboratory has the same capabilities. However, we have also added new ones. Now you can choose from three different physical configurations of the pendulum, and not just choose the angle from which you launch it. The three physical configurations are as follows. The first is the basic pendulum, the same as in the original laboratory. The second is the same pendulum, but with a can of soda attached to the bottom of the pendulum. The third is the same pendulum, with the same soda, but in this case attached to the top. This allows the student to see the effect of varying the mass of the pendulum and the distribution of that mass without changing the length.

In addition, the laboratory’s own interface design has been improved. The original version of the laboratory presented all controls on a single screen. In the improved version, the experience has been divided into four distinct stages, to make the experimentation more comfortable and intuitive.
Introduction stage
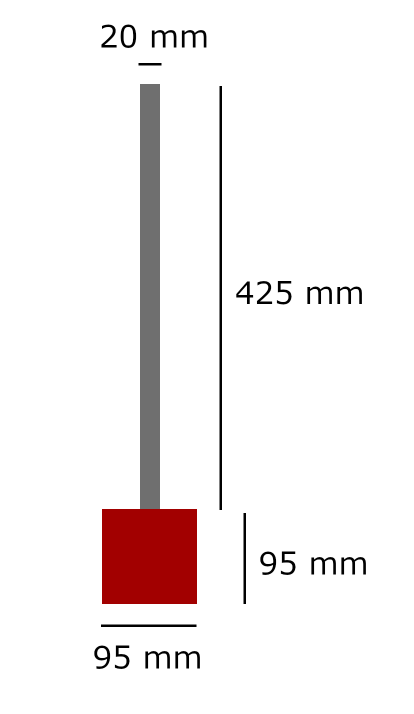
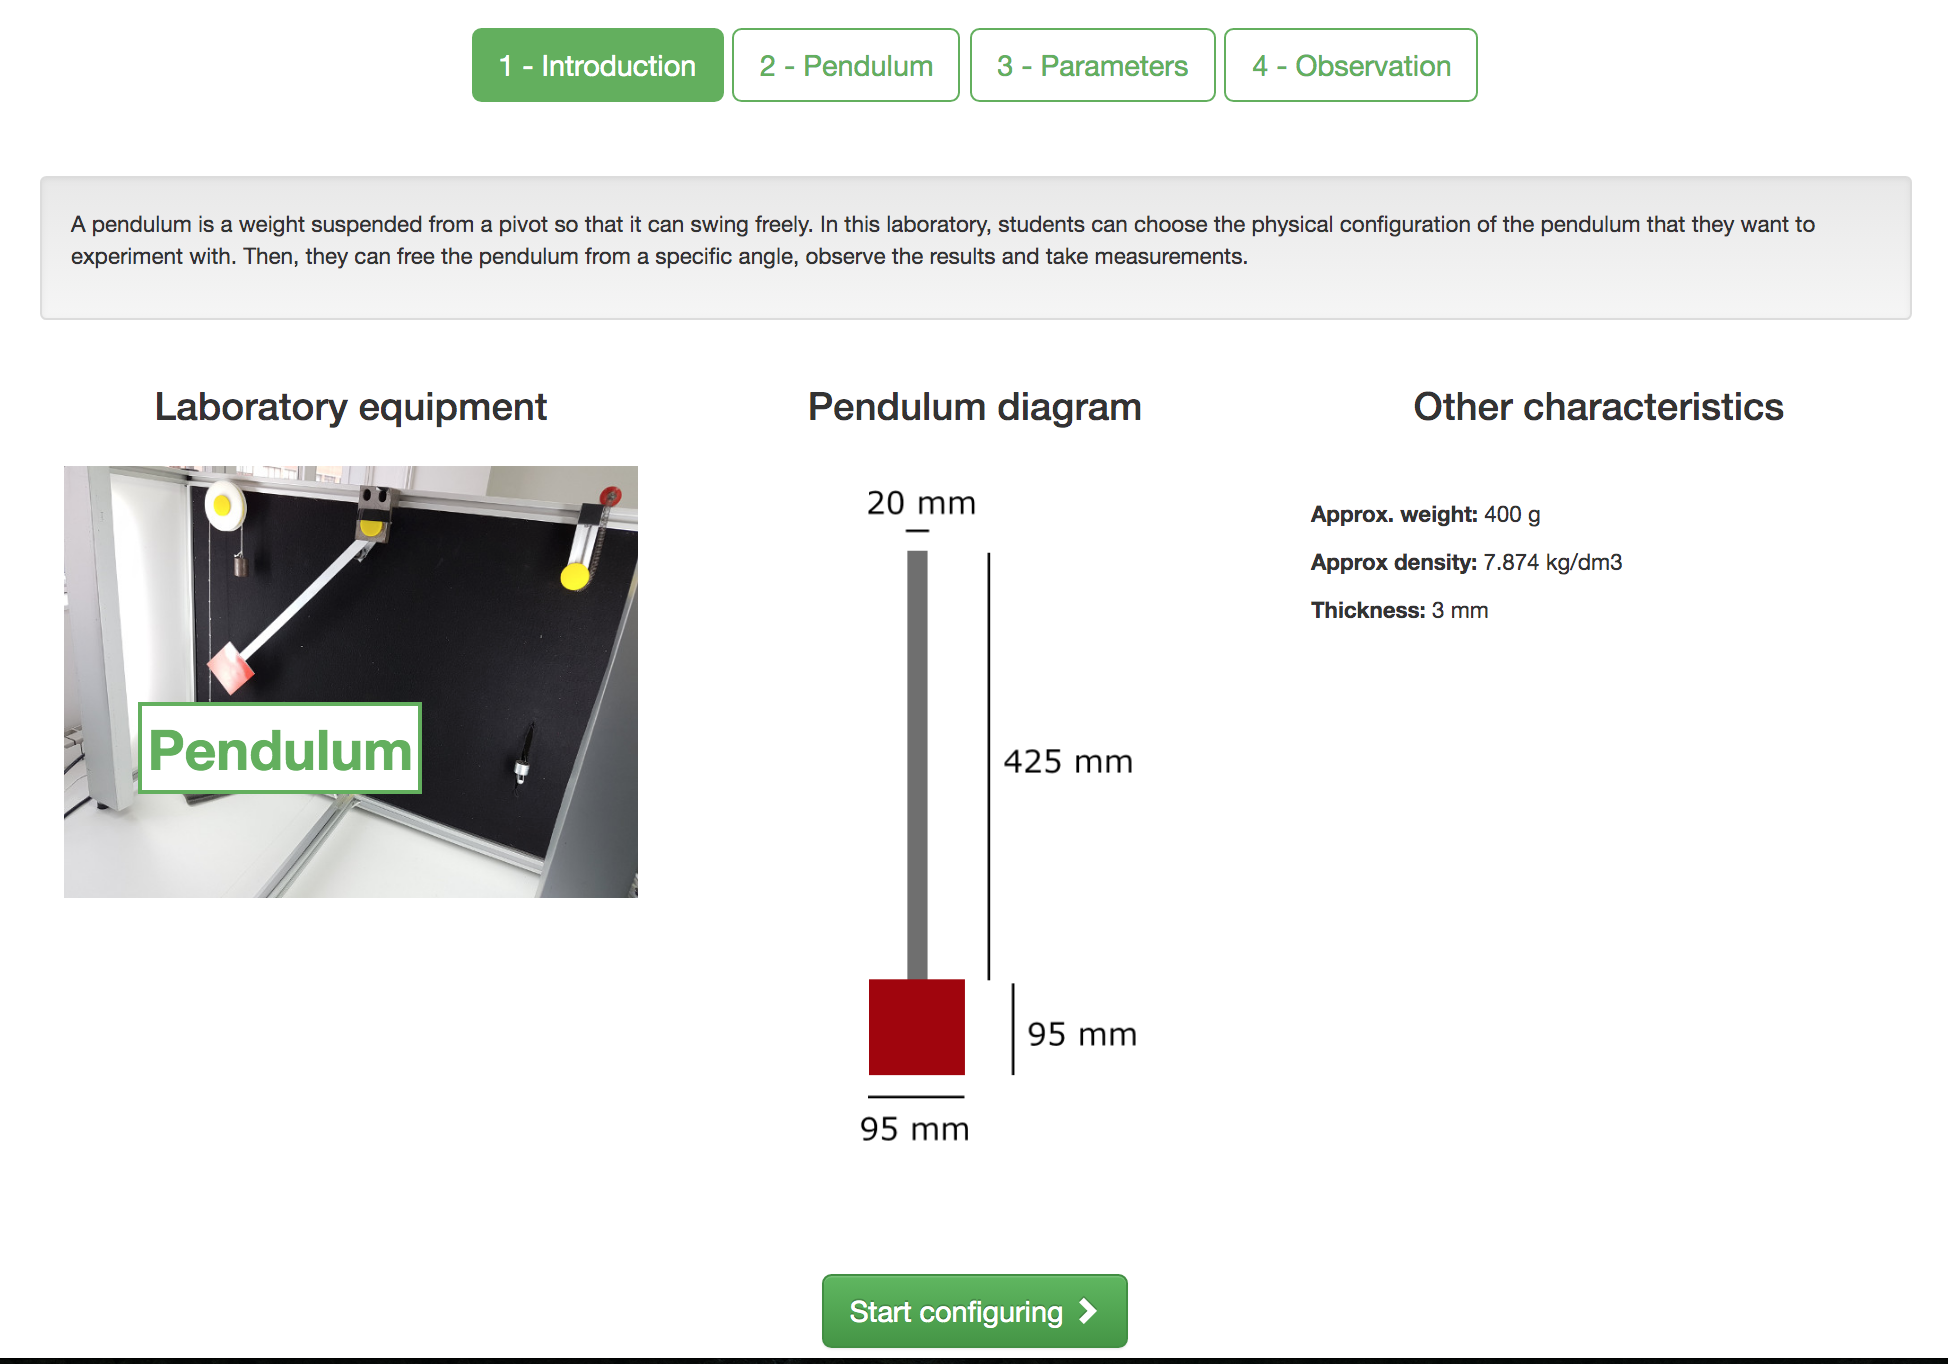
The introduction stage is the first one the student finds. It not only briefly introduces the laboratory, but also provides a set of basic data and values that can be used later to perform the measurements. For example, we can see here a diagram with the shape and scale of the pendulum. It includes the different measures, the density of the metal sheet used for it, and more.
Pendulum selection stage
At this stage, as mentioned before, the student can choose the physical configuration of the pendulum. You can choose if you want the “traditional” pendulum, or if you want the same pendulum but with added weight. This way you can check whether or not your results depend on the mass of the pendulum, or its distribution.
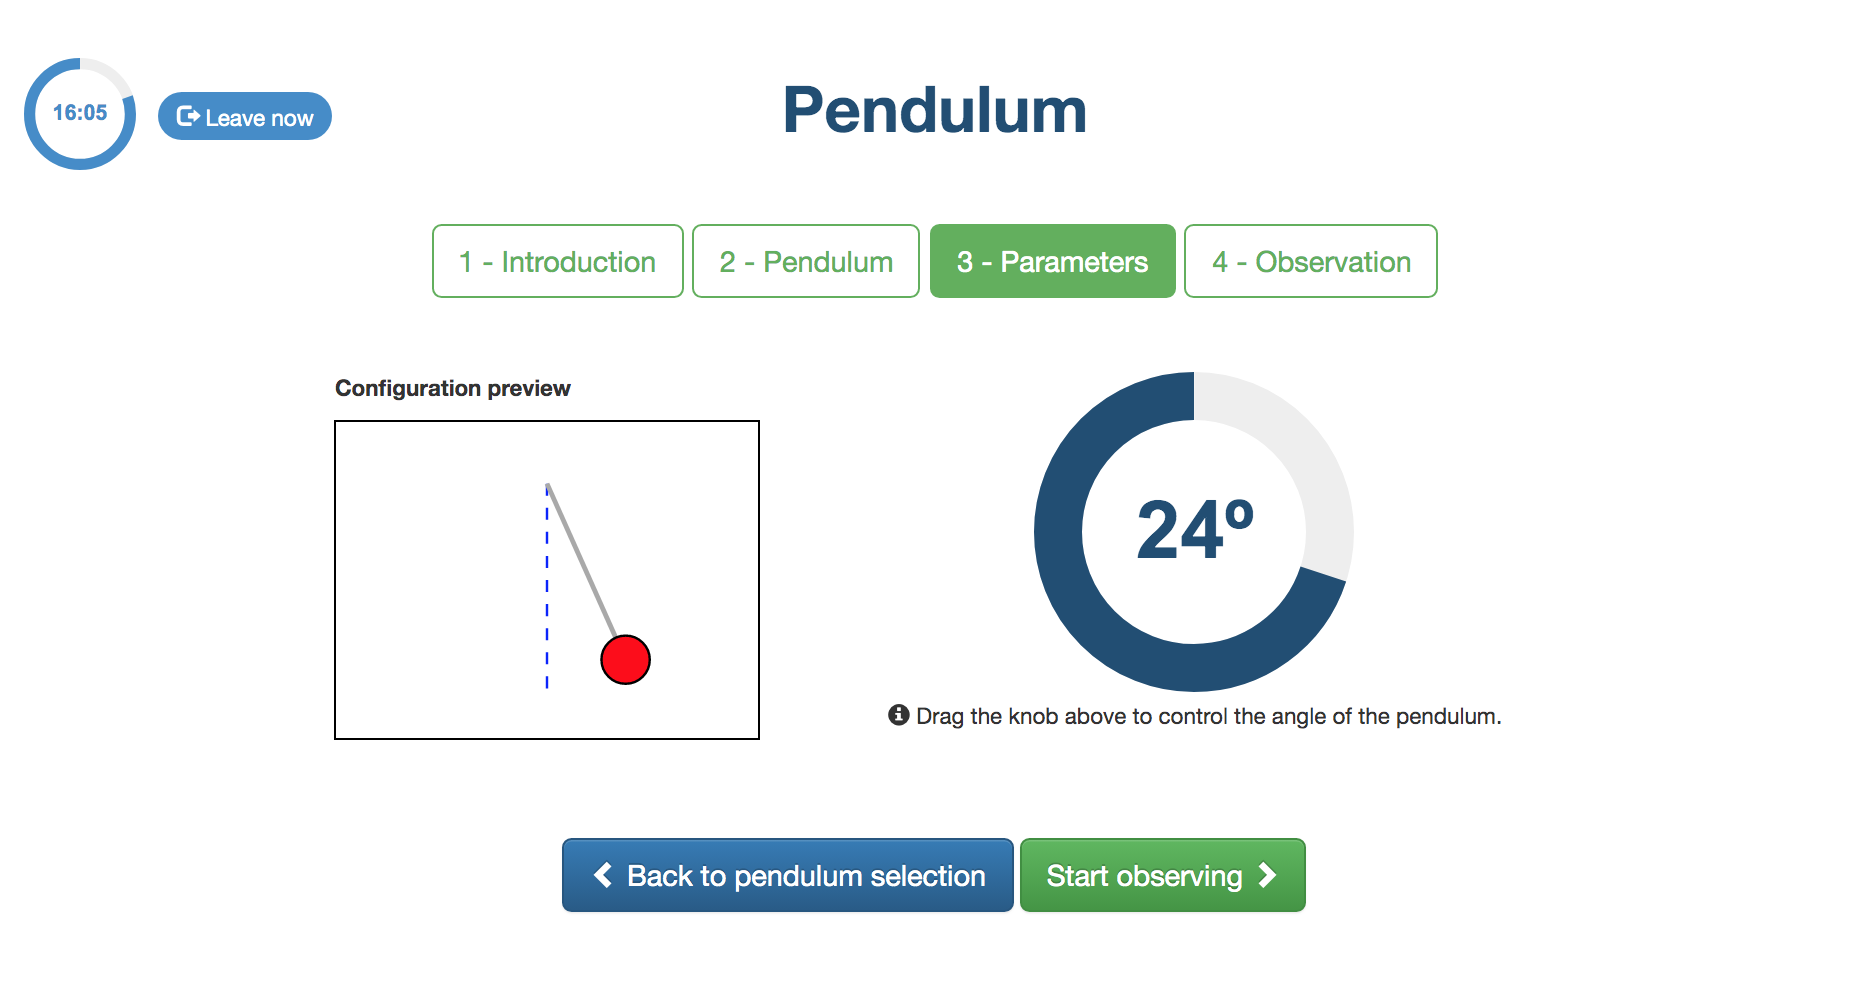
Parametrization stage
At this stage, students can begin to parameterize their experiments. Specifically, they can choose the angle from which they want to launch the pendulum. To choose the angle you can move the ring, as was done in the previous version of the laboratory. In addition, in this new version, you can also control the angle using the diagram on the left. Once you carry out your experiment with the angle you choose, it should be noted that you will normally return to this stage again, to try again with the same angle, or with different angles.
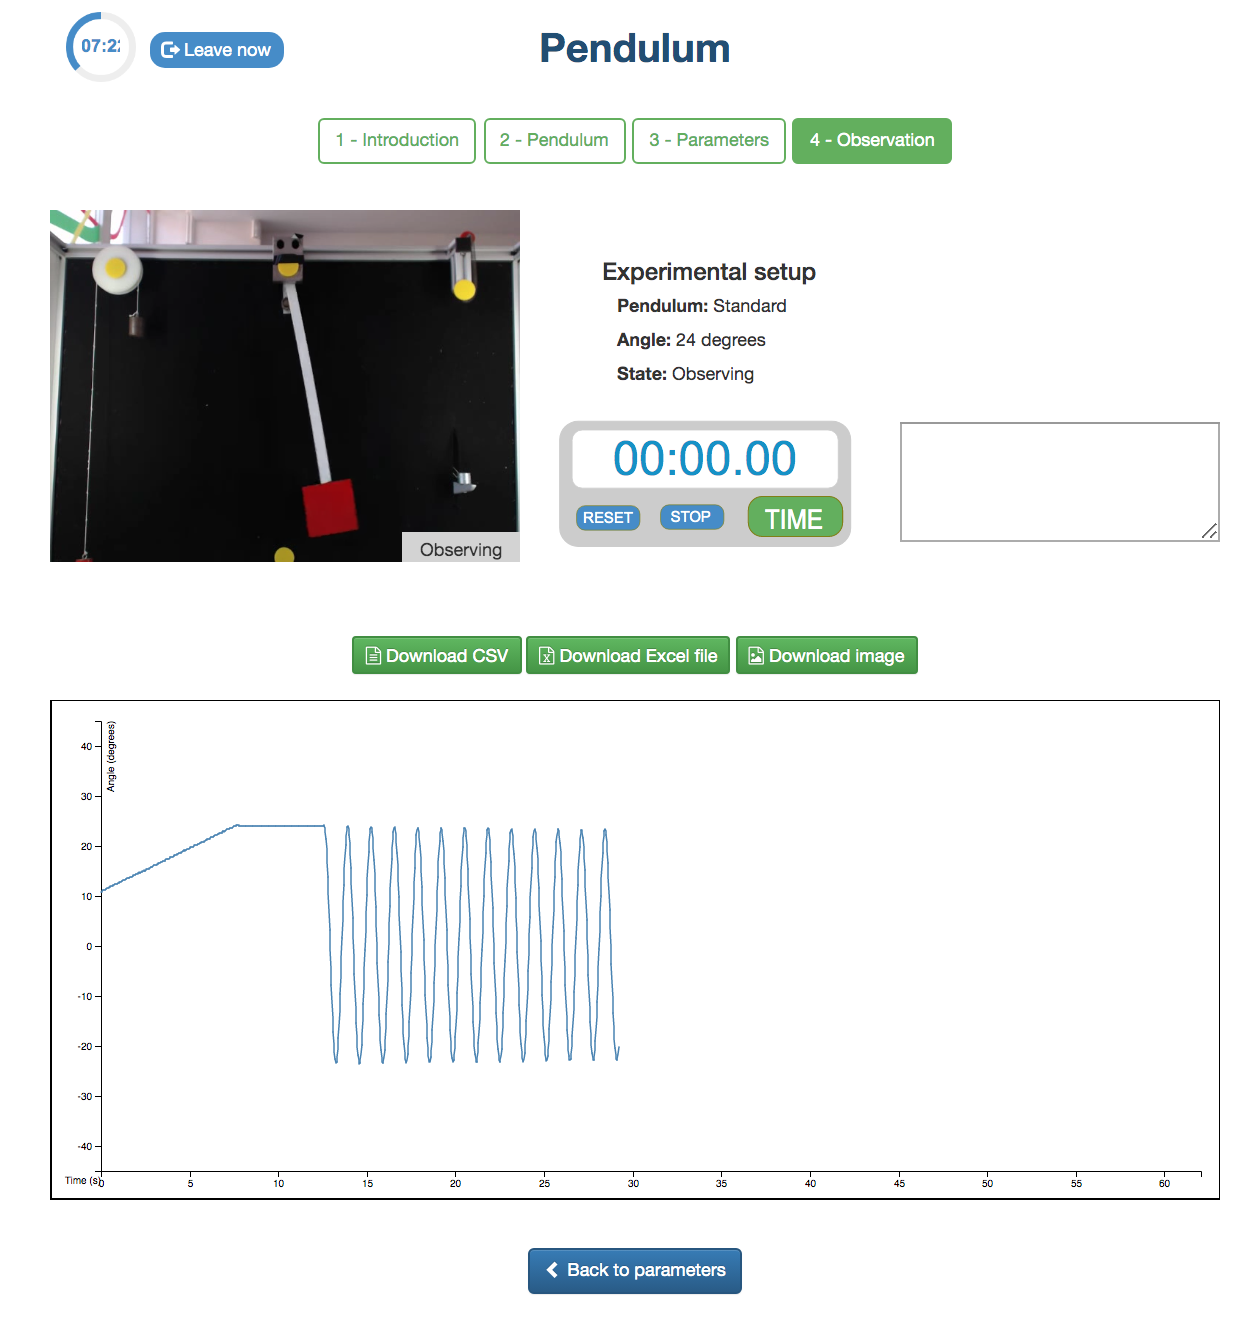
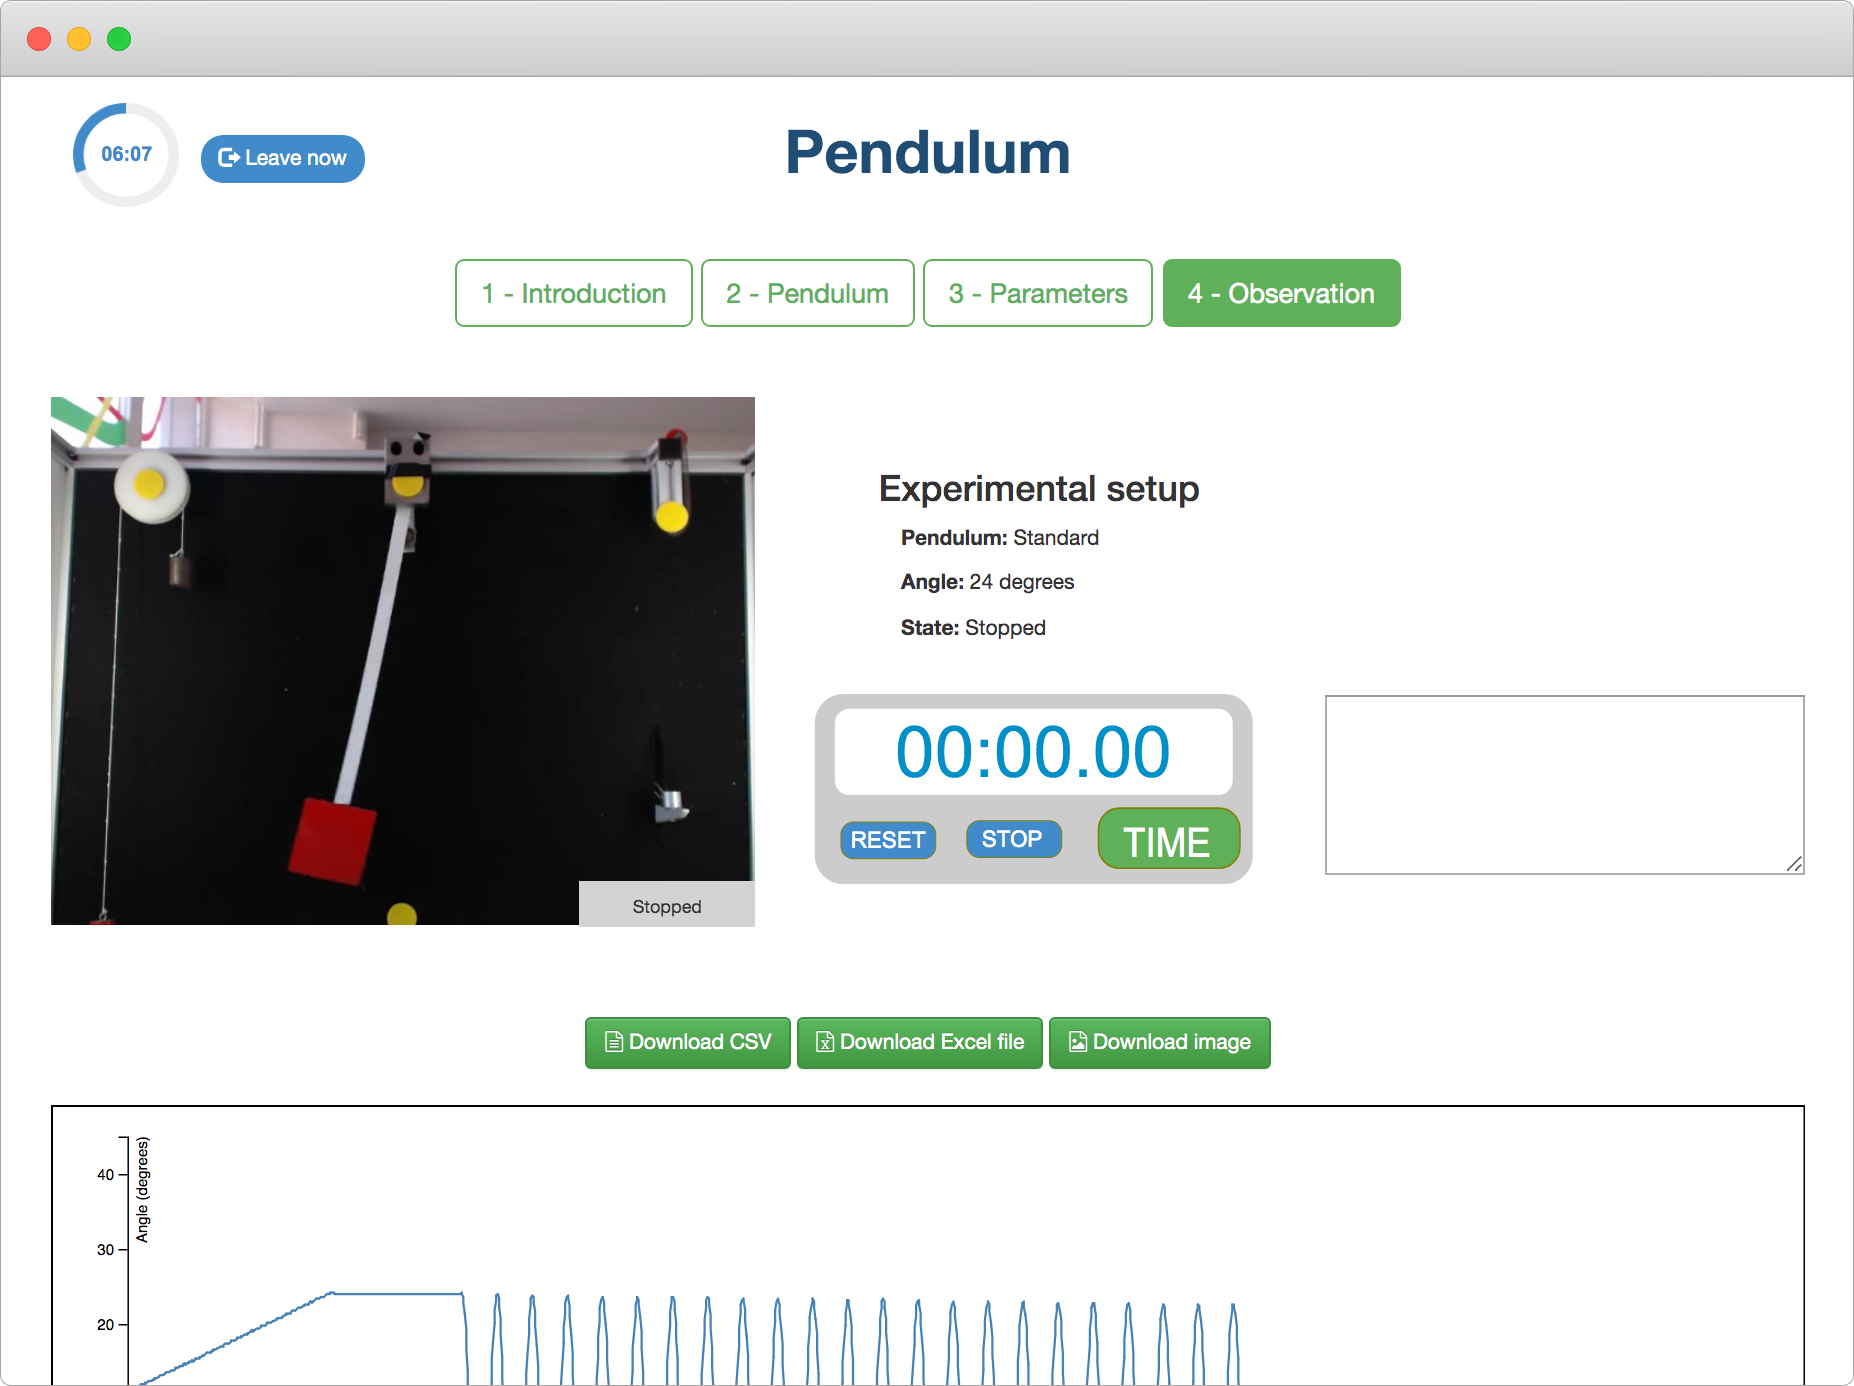
Observation stage
Once the angle is chosen, the experiment can begin. In the observation stage, the pendulum will be launched from the angle specified in the previous stage, and the student will be able to observe how the pendulum behaves. The actual oscillation of the device can be displayed in the video. Apart from that, you can also see a graph that represents the angle with respect to time. By placing the mouse on a point on the graph, students can know exactly what angle it was at that time, and thus see the period of oscillation. They can also take manual measurements by means of a stopwatch, although these measures will tend to be somewhat inaccurate.
In addition, they also have different options to download the data. The most common is perhaps downloading the data to Excel or CSV. In doing so, they will obtain a file with the raw data of their experimentation. With it, they can learn to make their own calculations using Excel or any other software or obtain graphs on their own.
Once the desired results have been obtained, it is possible to return to any previous stage at any time. In general, in fact, students will make several measurements with different angles before reaching conclusions.