If you are an instructor or administrator, and you have decided to get started with LabsLand, you probably know already that you want to provide real STEM experimentation to your students. You probably agree with us that practices with real laboratories and equipment are critical for a well-rounded technical and scientific education. And we can provide that!
Using LabsLand is rather easy for students, and, once they get the hang of it, for instructors as well. However, getting started with this new tool in a school can still be a bit of a challenge! This article will serve as a brief introduction to LabsLand, and as a guide for getting started with it, providing a recommended path and avoiding some common pitfalls.
LabsLand provides real laboratories for your lessons
The main goal of LabsLand is to provide you, as instructors, with laboratories to include in your lessons. All the laboratories are real, and all of them can be used remotely, through your browsers. Because our goal is to ensure that instructors have all the freedom they need and that they can use our labs in a similar way to how they would use hands-on ones, we do not provide simulations, and we do not provide complete stand-alone courses.
We believe that you, instructors, should at all times be in control of the content you teach and how you include the labs. Thus, we focus on the laboratory experience itself. We do not enforce any particular course or any particular set of activities to go with them.
However, we do try to provide certain pre-made activities or documentation files. Those activities are meant to be adapted freely. They are a good starting point to use a laboratory, to know what a laboratory is capable of, and to know what kind of activities are possible. We suggest that you use them as a guide, but that you do not limit yourself to them! Feel free to include the labs in your own activities, in any way you wish.
You have your own LabsLand space for your school
After you register your personal account in LabsLand, you will be asked to create your school space as well, unless we created the school for you.
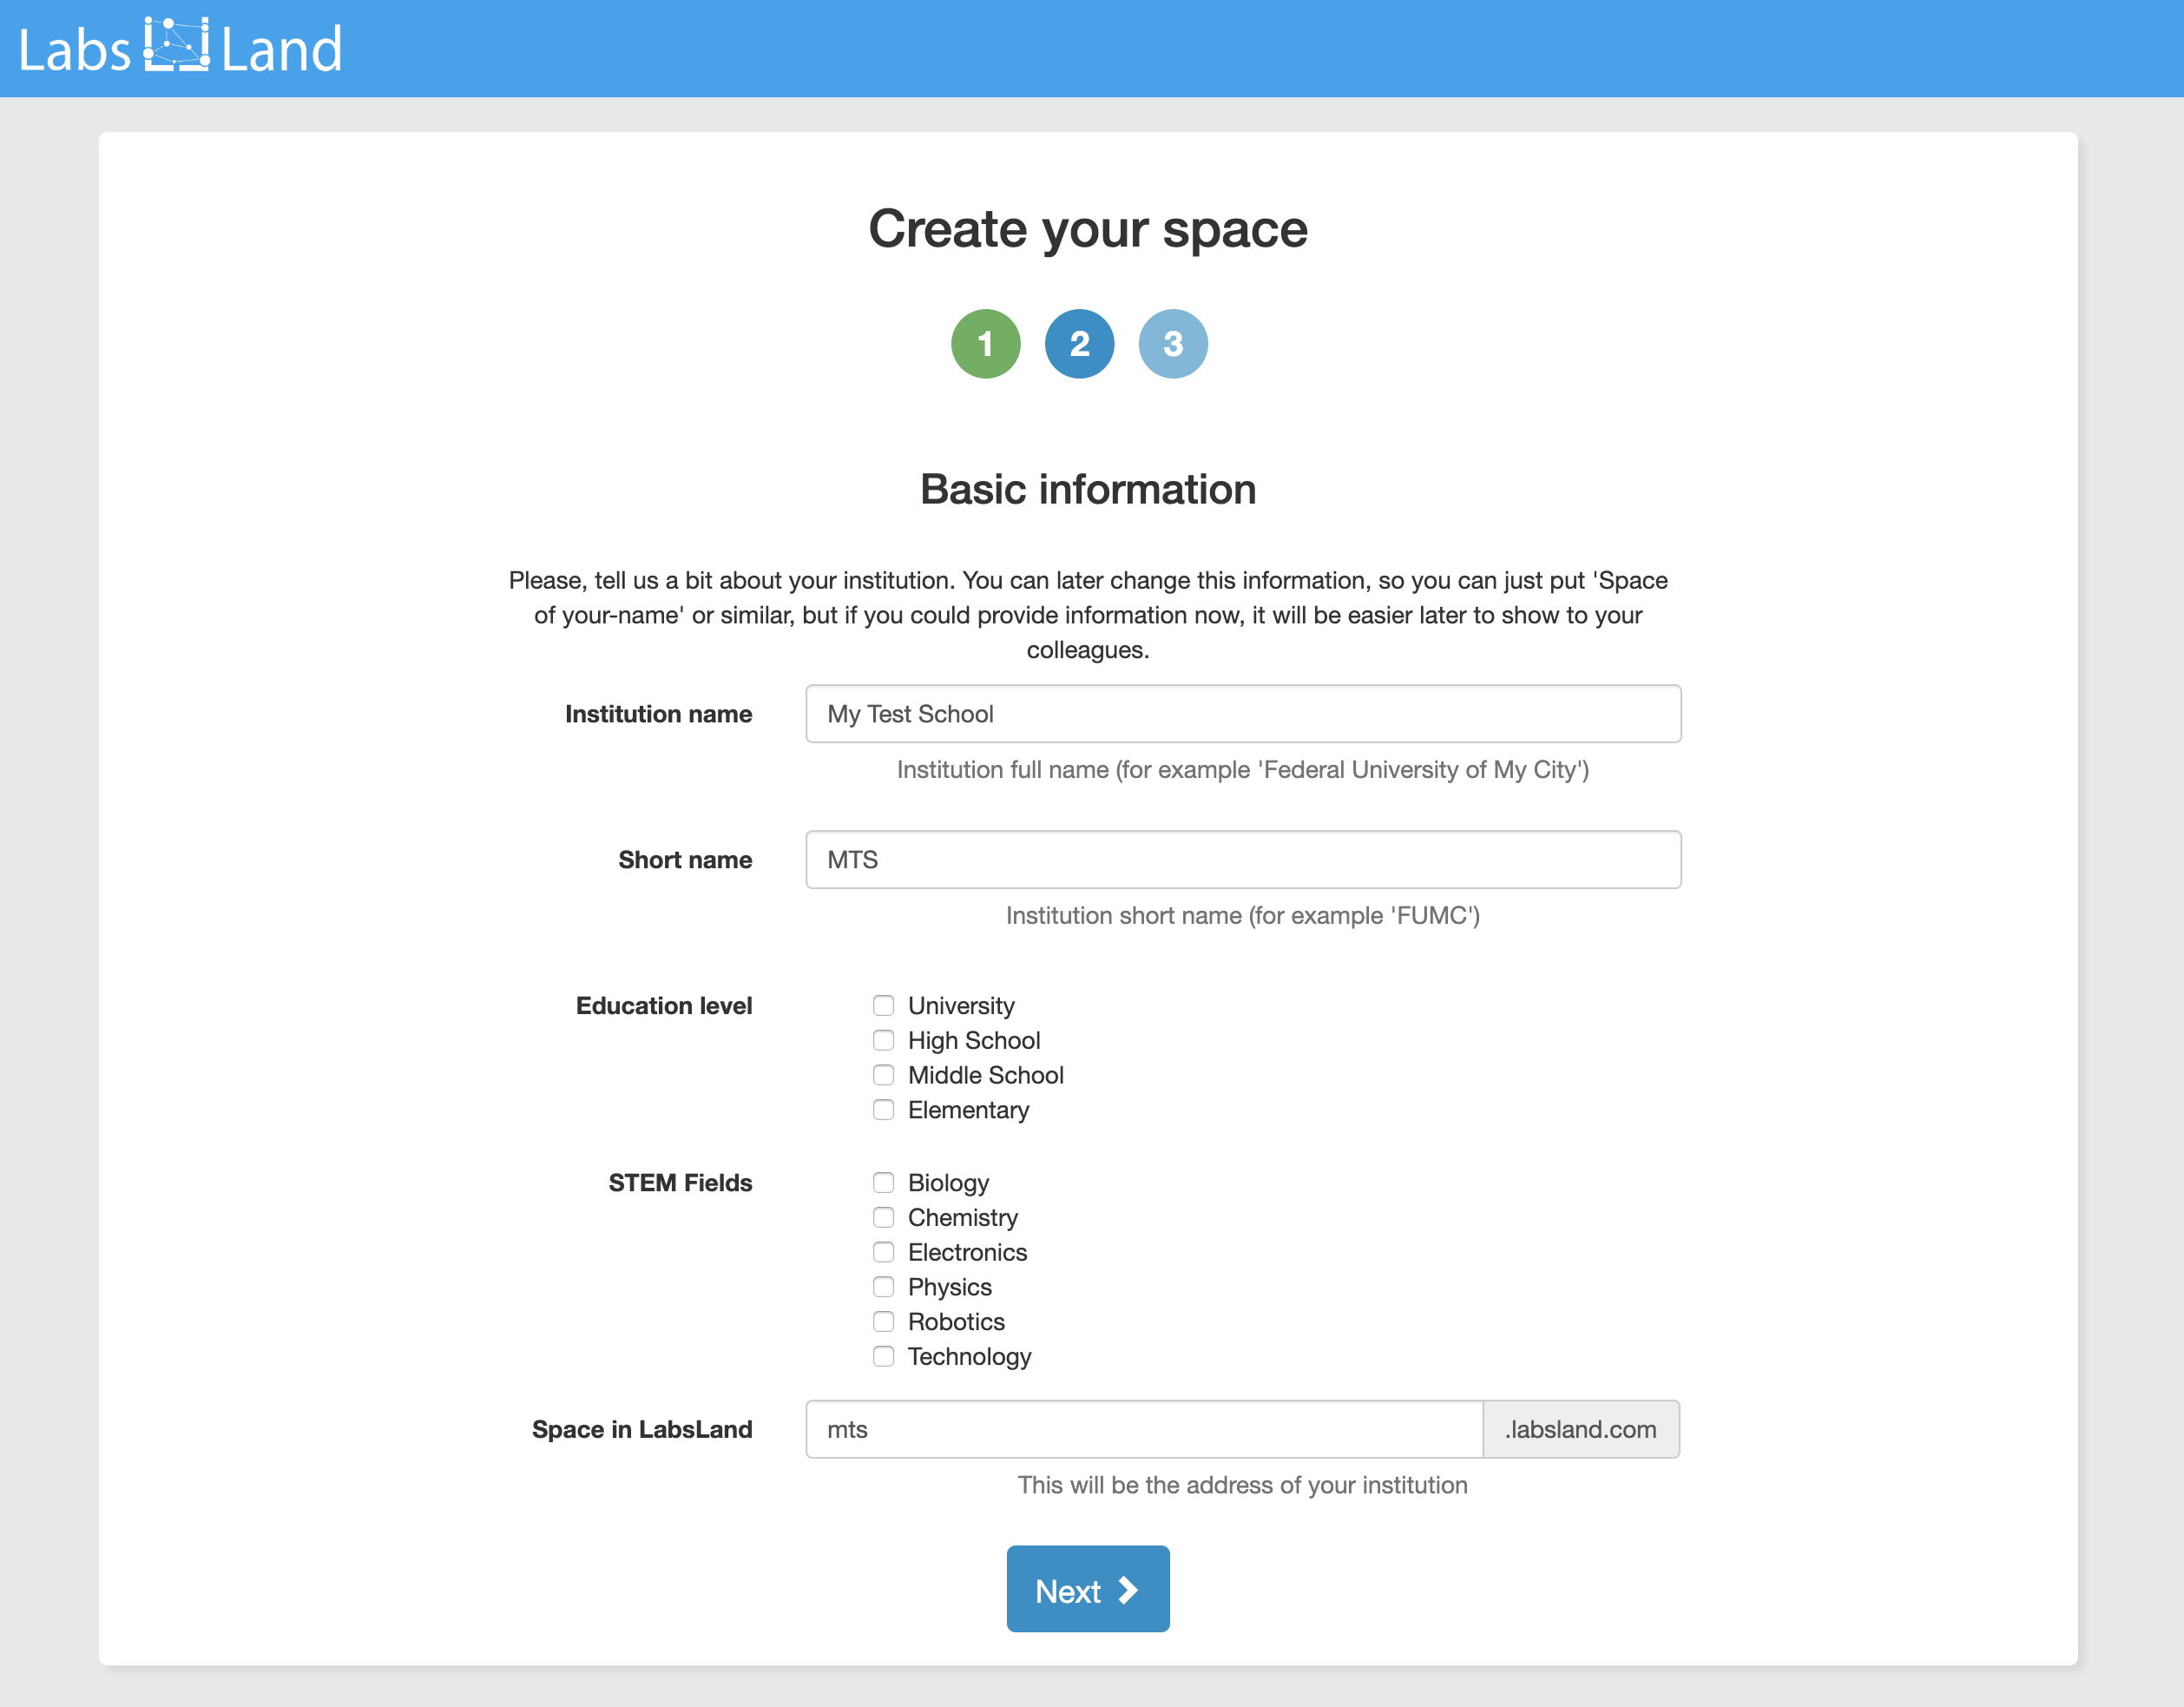
In Figure 1 above, you can see the start of the school creation process. Here you will be requested to enter information about your school and to choose the type of laboratories that you are most interested in. The choice of laboratories lets us customize your school space more appropriately for the beginning, but it won’t limit your choices: you can add any laboratory later.
Schools are only meant to have a single space, to be shared by all instructors and administrators. The first person to create the space will be an administrator, but additional ones can be added later. Therefore, if a space for your school exists already, you should probably ask whoever created it to add you to the space, rather than create a new one from scratch.
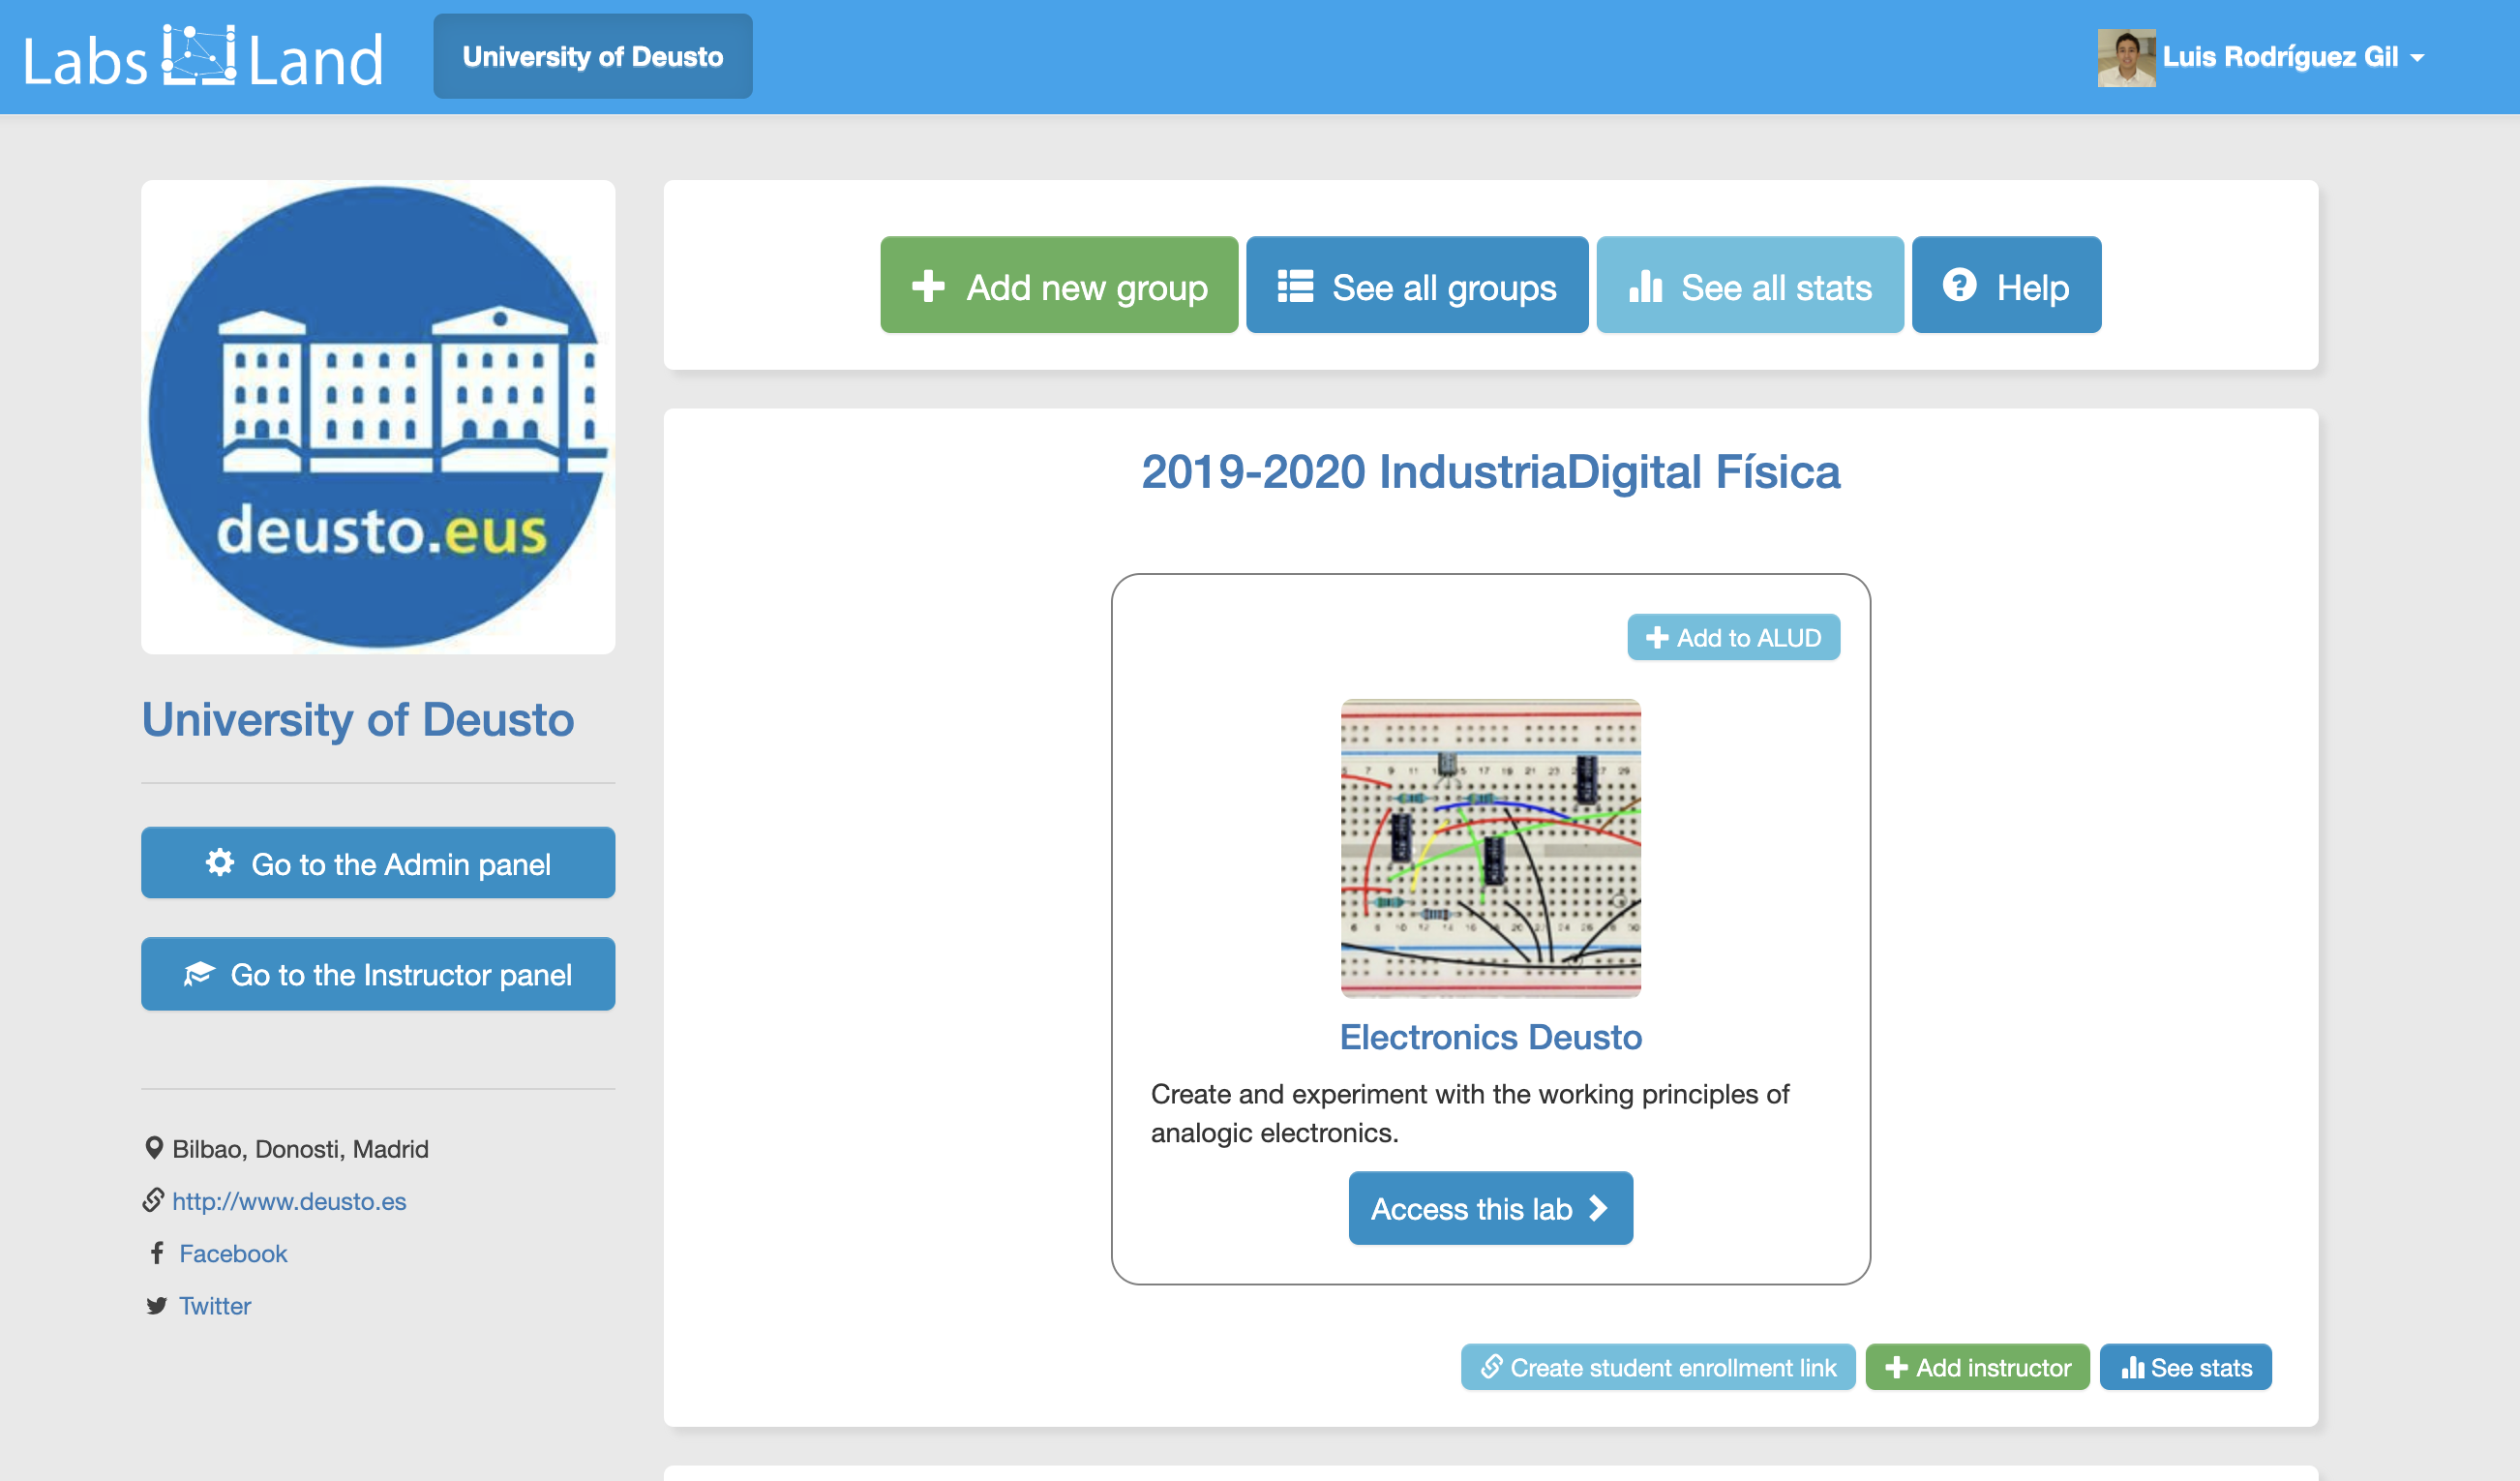
The space for your school will be similar to the space in Figure 2. If the short name for your school is, for example, “mts”, then your LabsLand space will be something such as https://mts.labsland.com.
Contact us to get started faster!
Getting started with LabsLand is not hard. The process is in fact described here in this article. However, it is often faster and easier if you give us the chance to personally speak with you through video-conference so that we can discuss your needs and suggest the approach and the laboratories that better fit your particular case.
If you want to arrange a video-conference with us, just write us an e-mail to support@labsland.com. We will be glad to, whether it is to help you get started or to answer specific questions that you might have. There is no associated cost to this, and no obligations at all.
What can I do in my school’s space?
The school space is mostly for administration purposes. Students will normally access the labs directly through Google Classroom (or a different LMS), and won’t see the space.
The main things administrators can do in their school’s space is to manage groups, to manage users, to create special links for students to access the laboratories in Google Classroom, and to see various learning analytics through which you can see how students are using the labs, and how often.
The typical workflow for instructors
The typical workflow for instructors is to:
- Create a group for each course (e.g., “Physics 2020”). This will be the group that your students will automatically join.
- When creating the group, assign the laboratory permissions for that group. For example, in the case of Physics 2020, you will most likely want to add permission to some of the labs for physics.
- Create special Google Classroom links to specific laboratories within that group, and paste them into your Classroom course. That way, students will be able to access the lab through a simple click.
Creating a group for your courses
Once your school’s space has been set up, you should create a group for each of your courses. We recommend to include the year in the title as well. For instance, you can create a “Physics 2019-2020” group. To do so, you need to click the “Add new group” button in the upper left side of the screen, on your school’s space.
When creating a new group, first you will be asked to choose a name for the group (“Physics 2019-2020”). Second, you will be asked to assign users to the group. You do not need to assign students, just instructors. And you will probably want to assign yourself. That will give you access to the laboratories in that group. Third, you need to assign permissions for laboratories. You should add permissions for those laboratories that your group will use. For instance, in our example, we would add permissions for some physics laboratories.
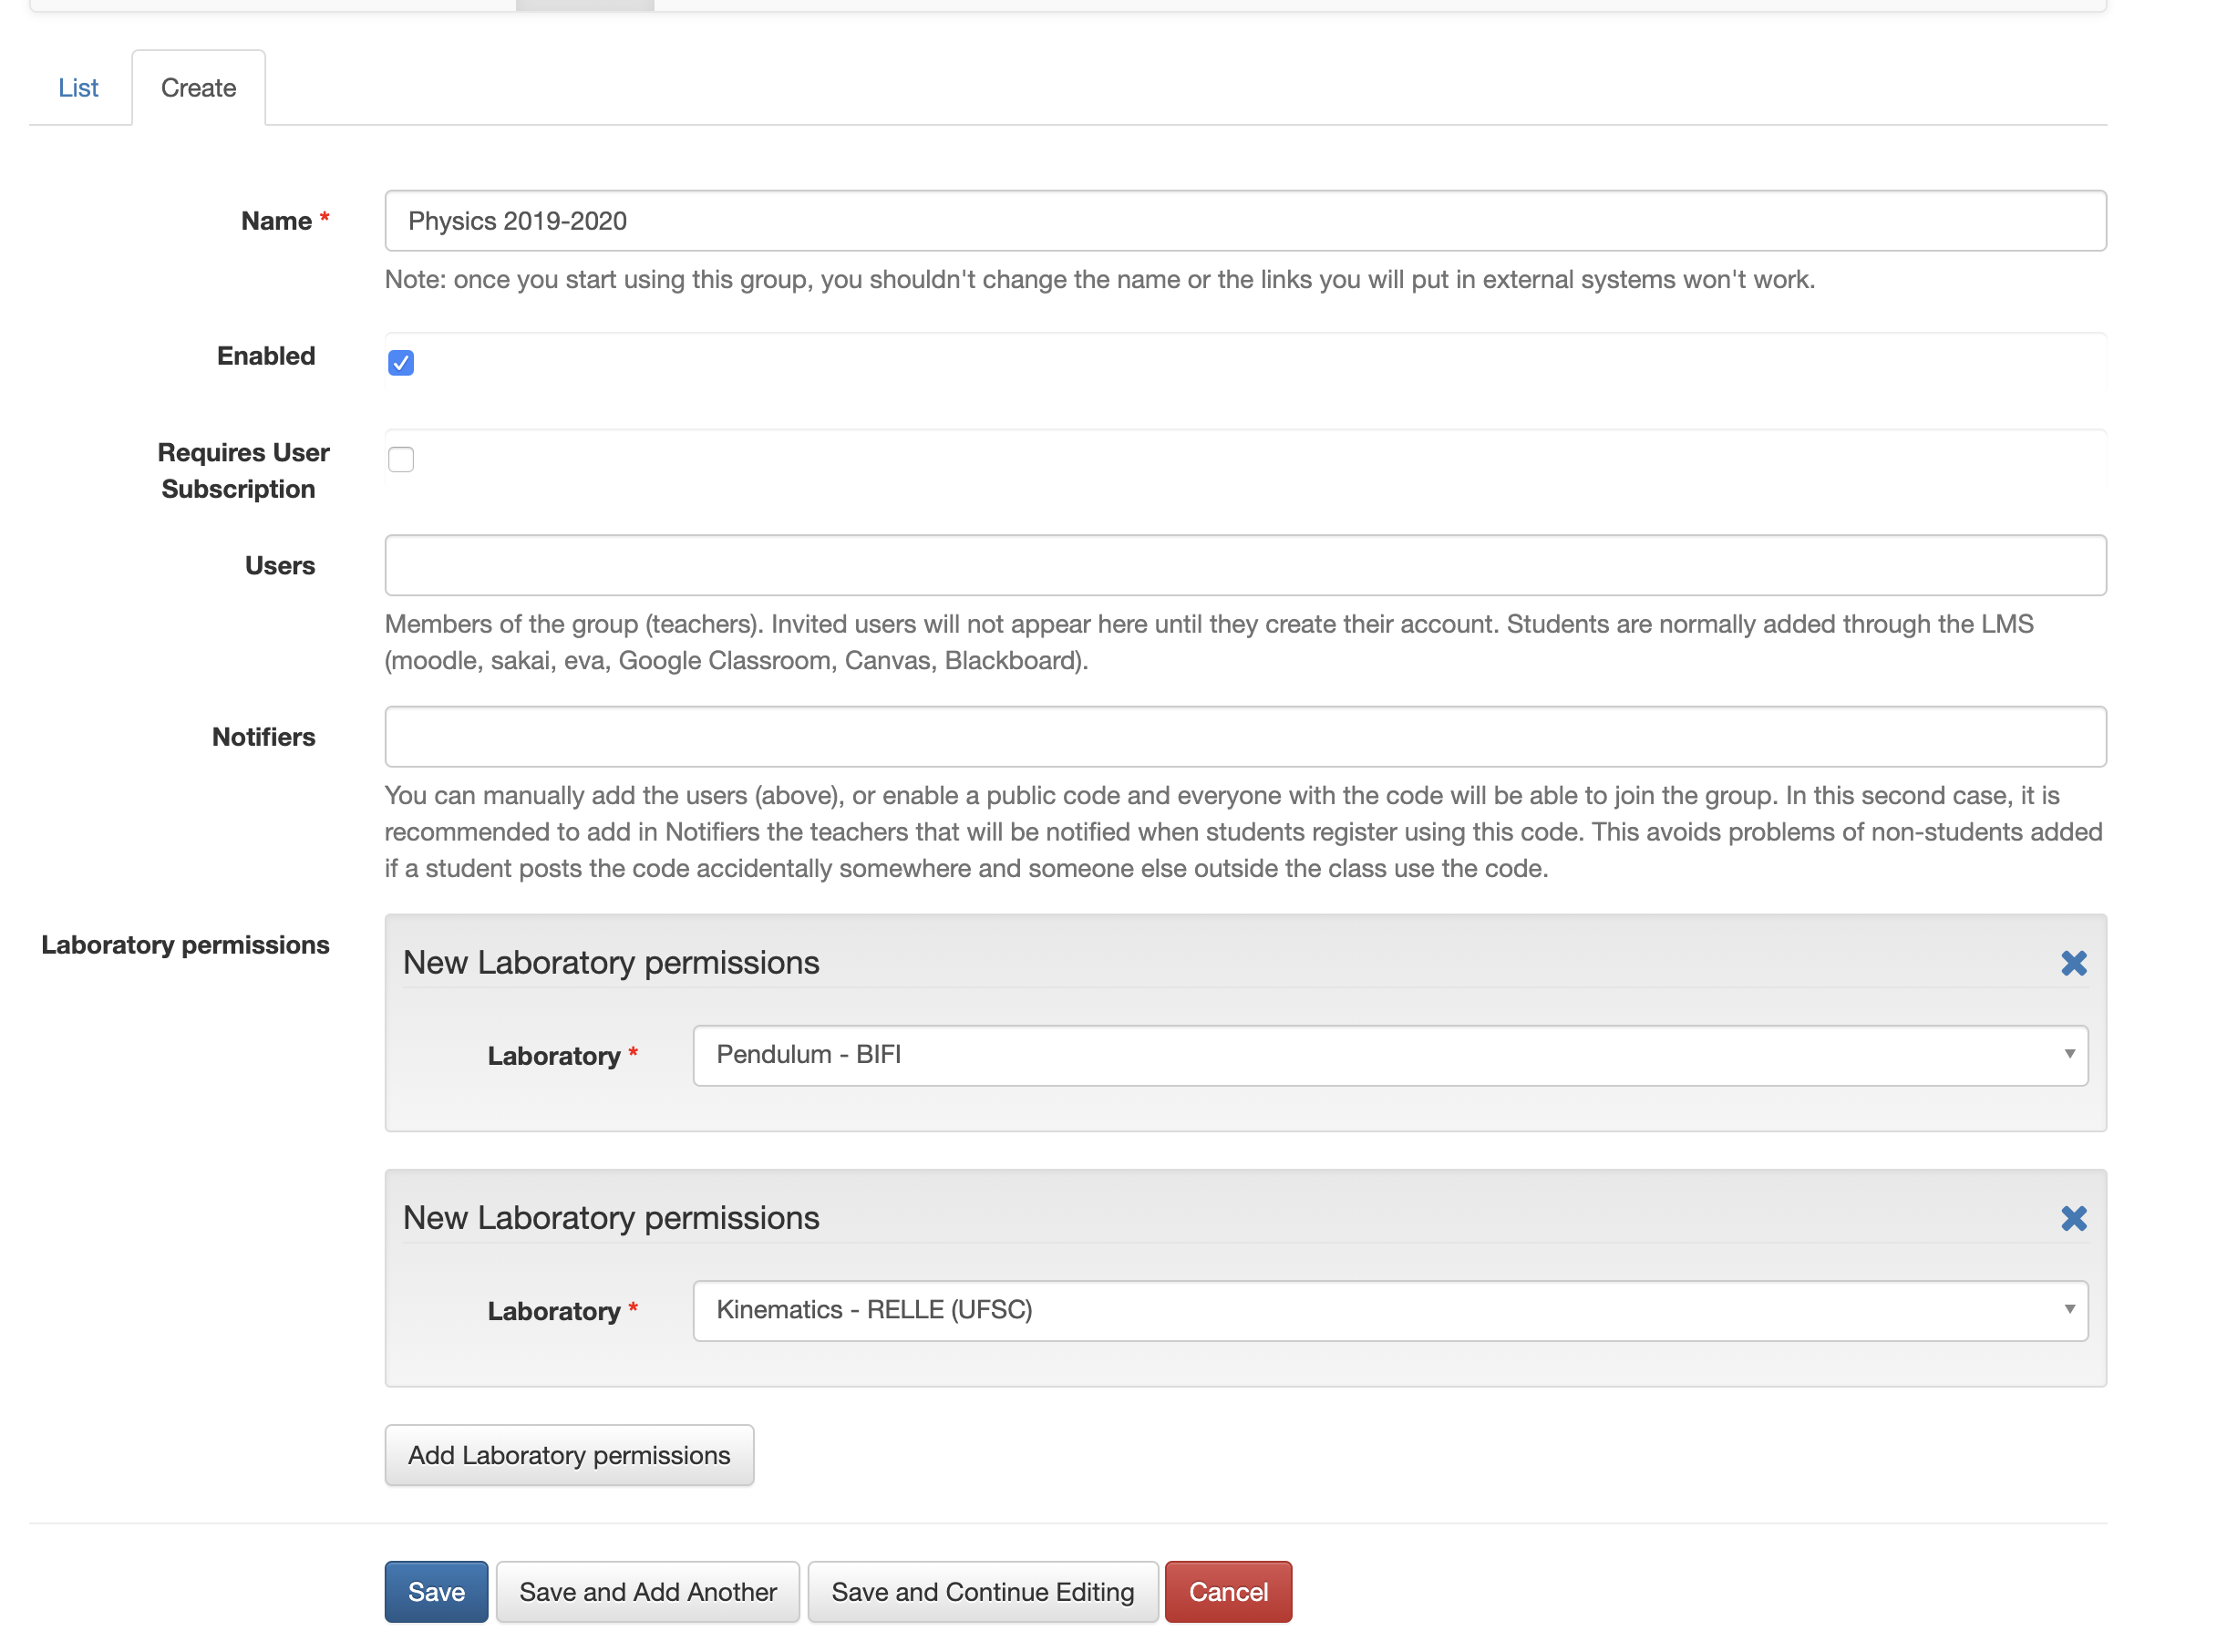
Figure 4 shows the interface. When you are done inserting the information, just click “save”.
Creating special Google Classroom laboratory links to place in your Classroom course
Once your group is properly created and it has access to one or more laboratories, you will see something such as Figure 5.
In this case, we show the space for the University of Deusto. Your school will have its own. You can see a “2019-2020 IndustriaDigital Física” group, which is just a group for an electronics-related subject. You can also see that it has access to the “Electronics Deusto” laboratory.
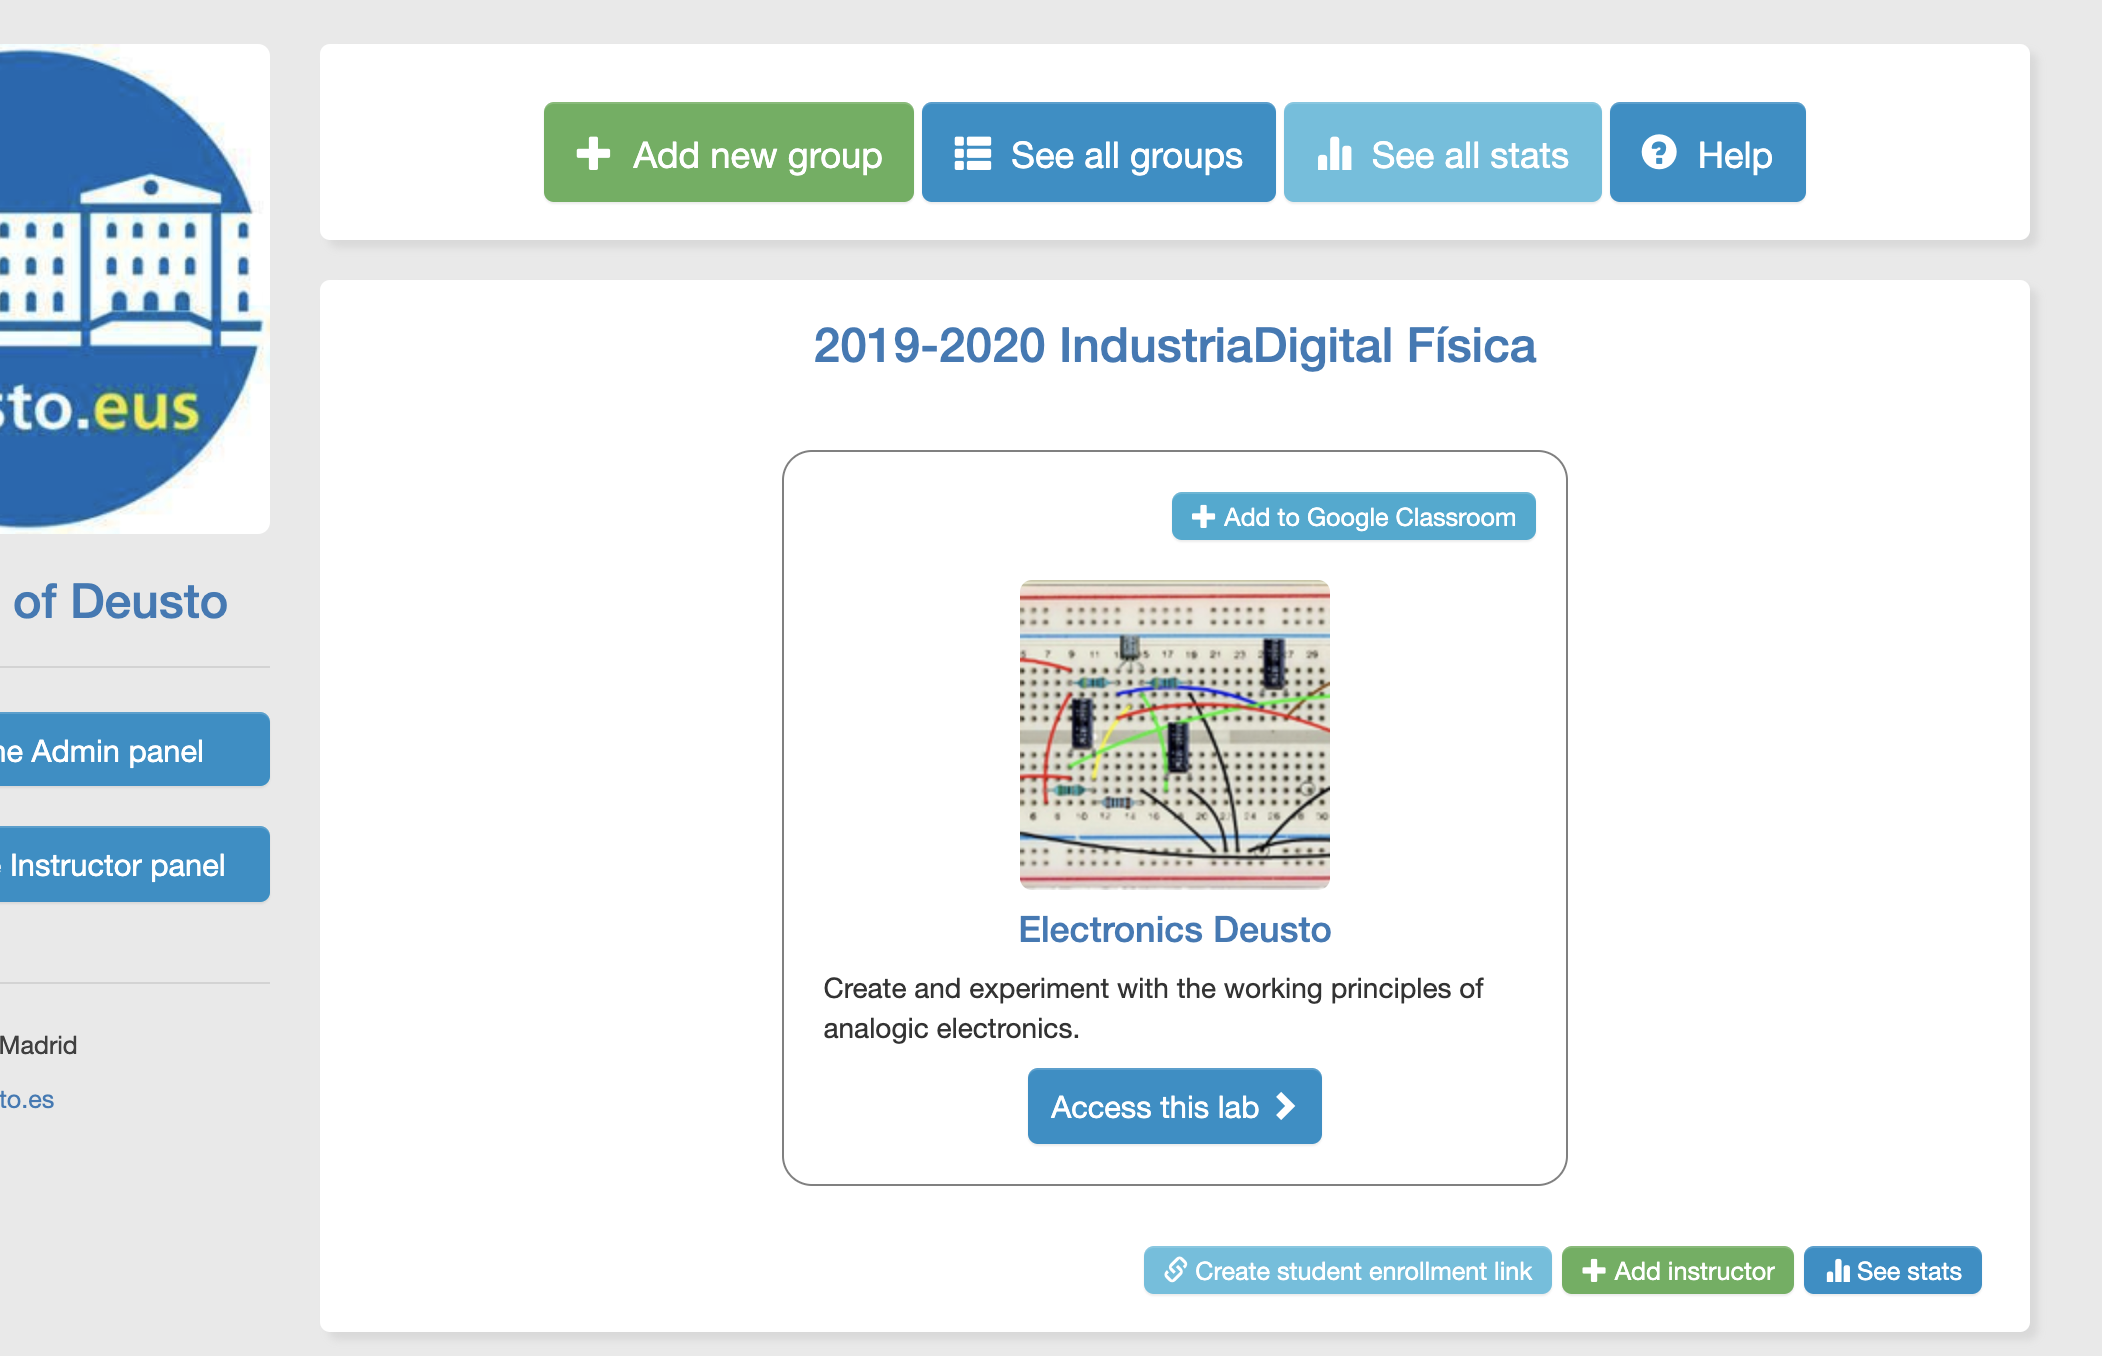
The next goal is to give your students a way to access the labs easily. This is done by creating a special link, and then pasting that link into your Google Classroom course. Your students will simply need to click on the link, and they will be able to access the laboratory.
To create the link, just click on the “Add to Google Classroom” button. You will arrive at a screen that resembles the one in Figure 6.
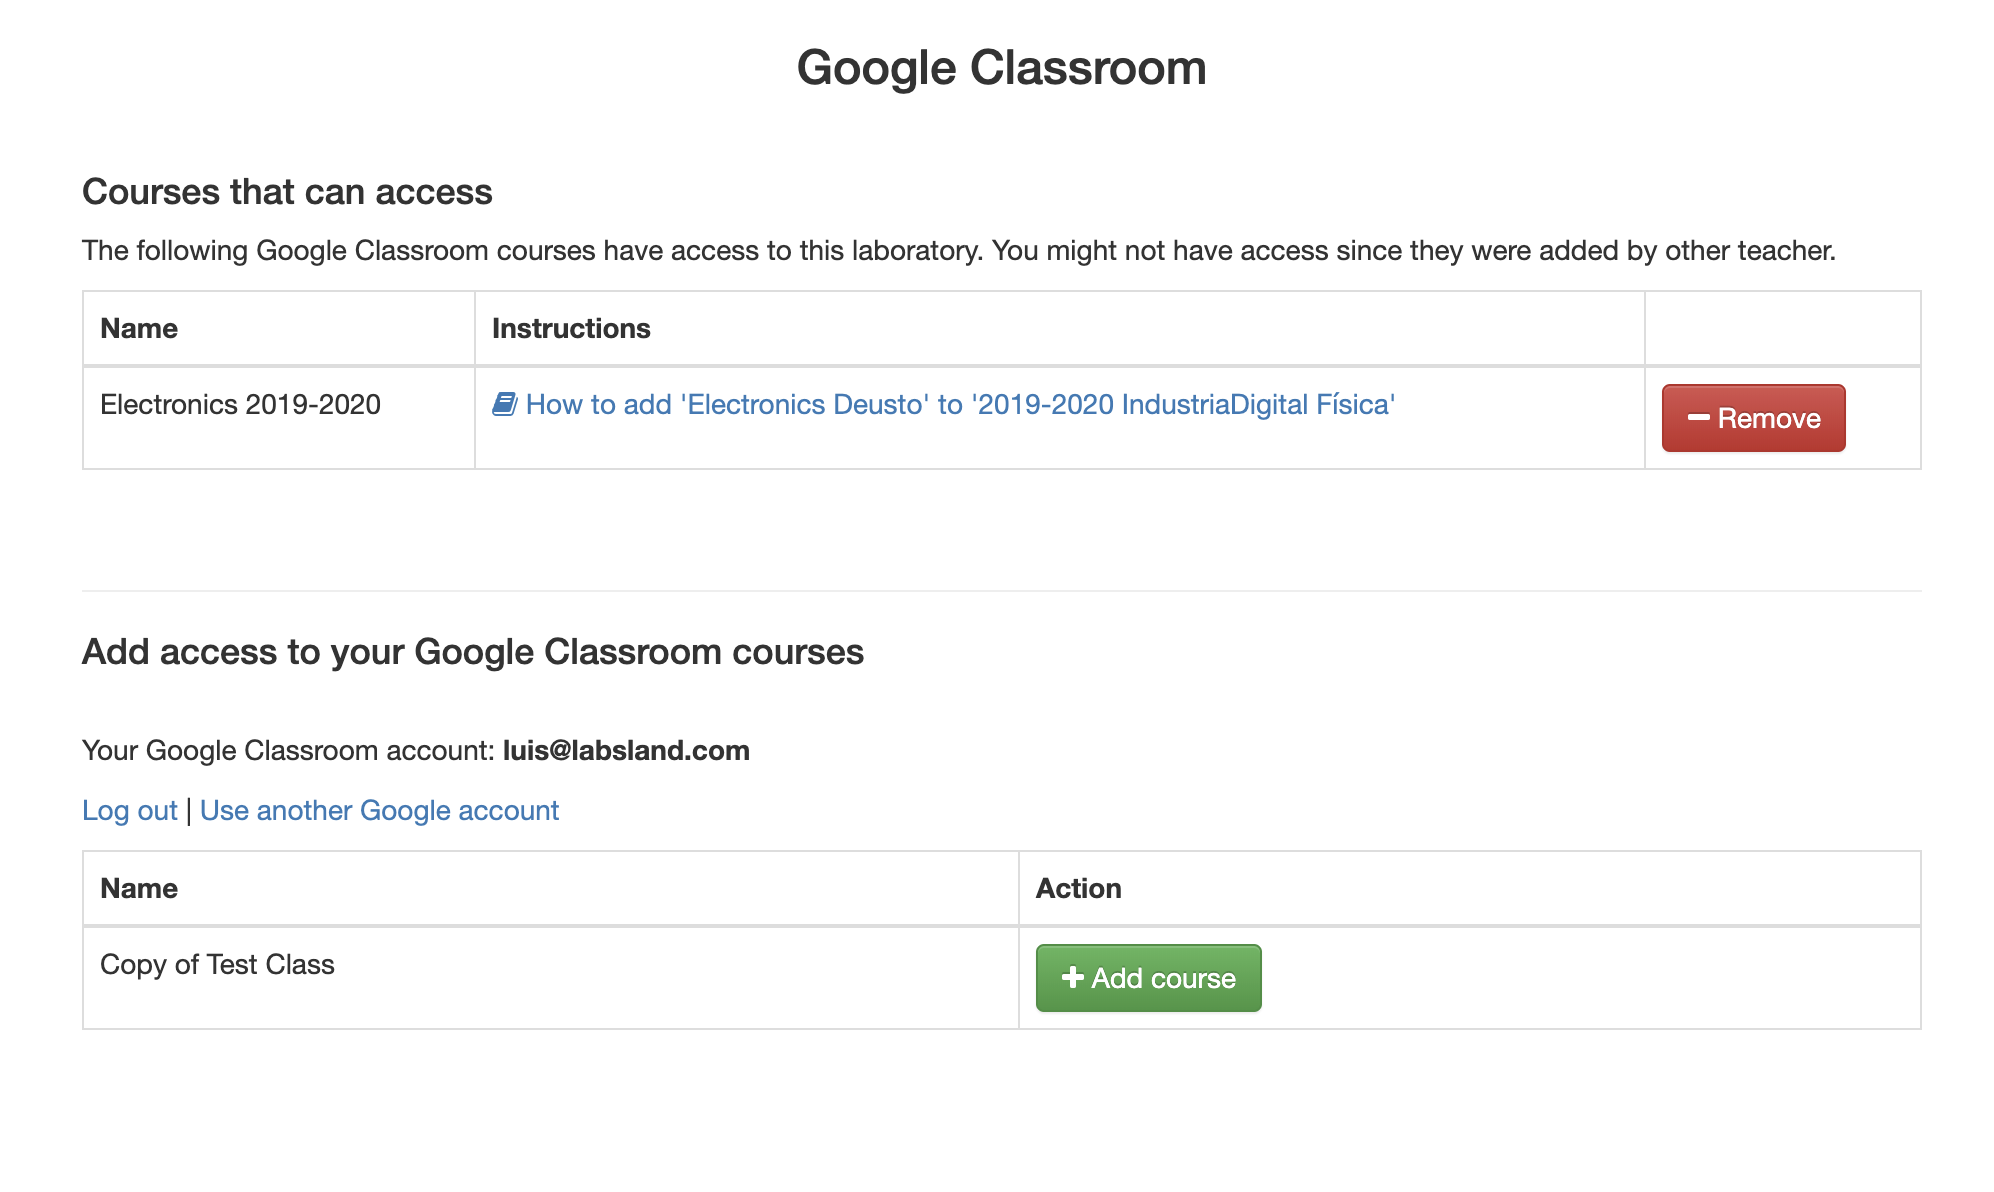
You might need to login into Google Classroom when you arrive at this screen. Once you do, you will see a list of available courses. You should follow the steps as indicated, until you can see the Instructions to, for example in this case, “Add Electronics Deusto to 2019-2020 IndustriaDigitalFísica”. Just click on it, and you will obtain the link and more detailed instructions to use it with Google Classroom, as you can see in Figure 7.
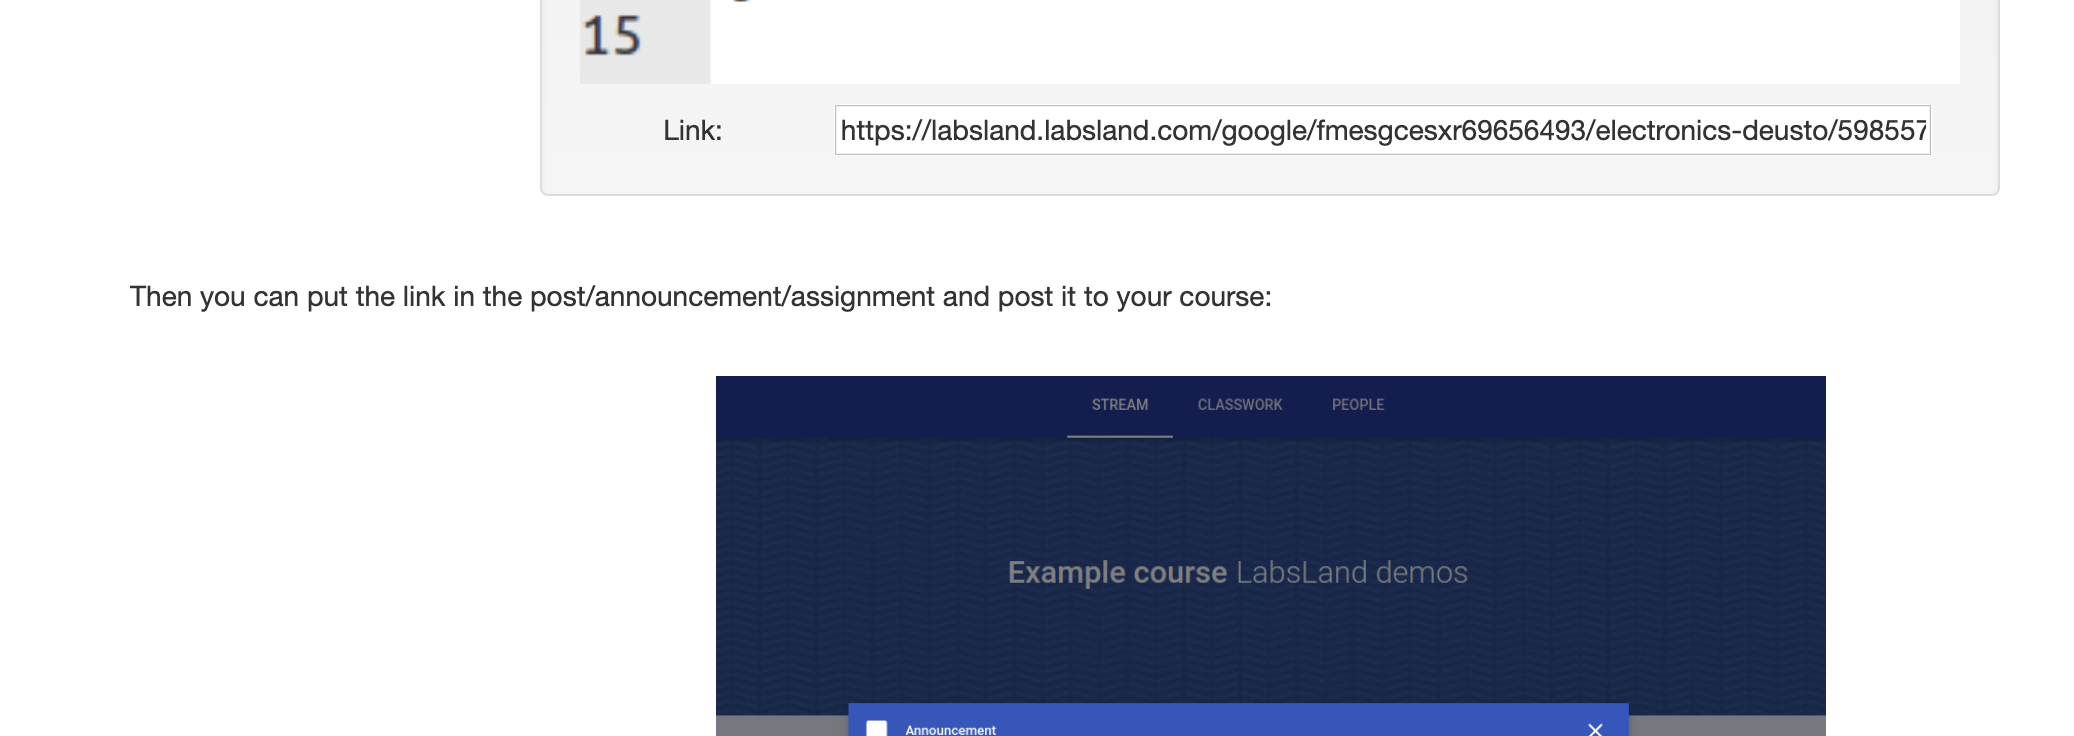
The important part here is the link that is provided. It will be something such as the link above, but different. Only students that have access to the Google Classroom course that you have associated it with will be able to follow it.
Finding laboratories to use with your students
You can go to the main website (https://labsland.com) to see which laboratories are available. You can use the filters on the left to filter by subject, course, and other criteria.
Finding educational contents and pre-made activities
Although you might want to create your own activities to include your labs in, you might want to have a look at some existing ones as a base or to have additional information about how to use the labs.
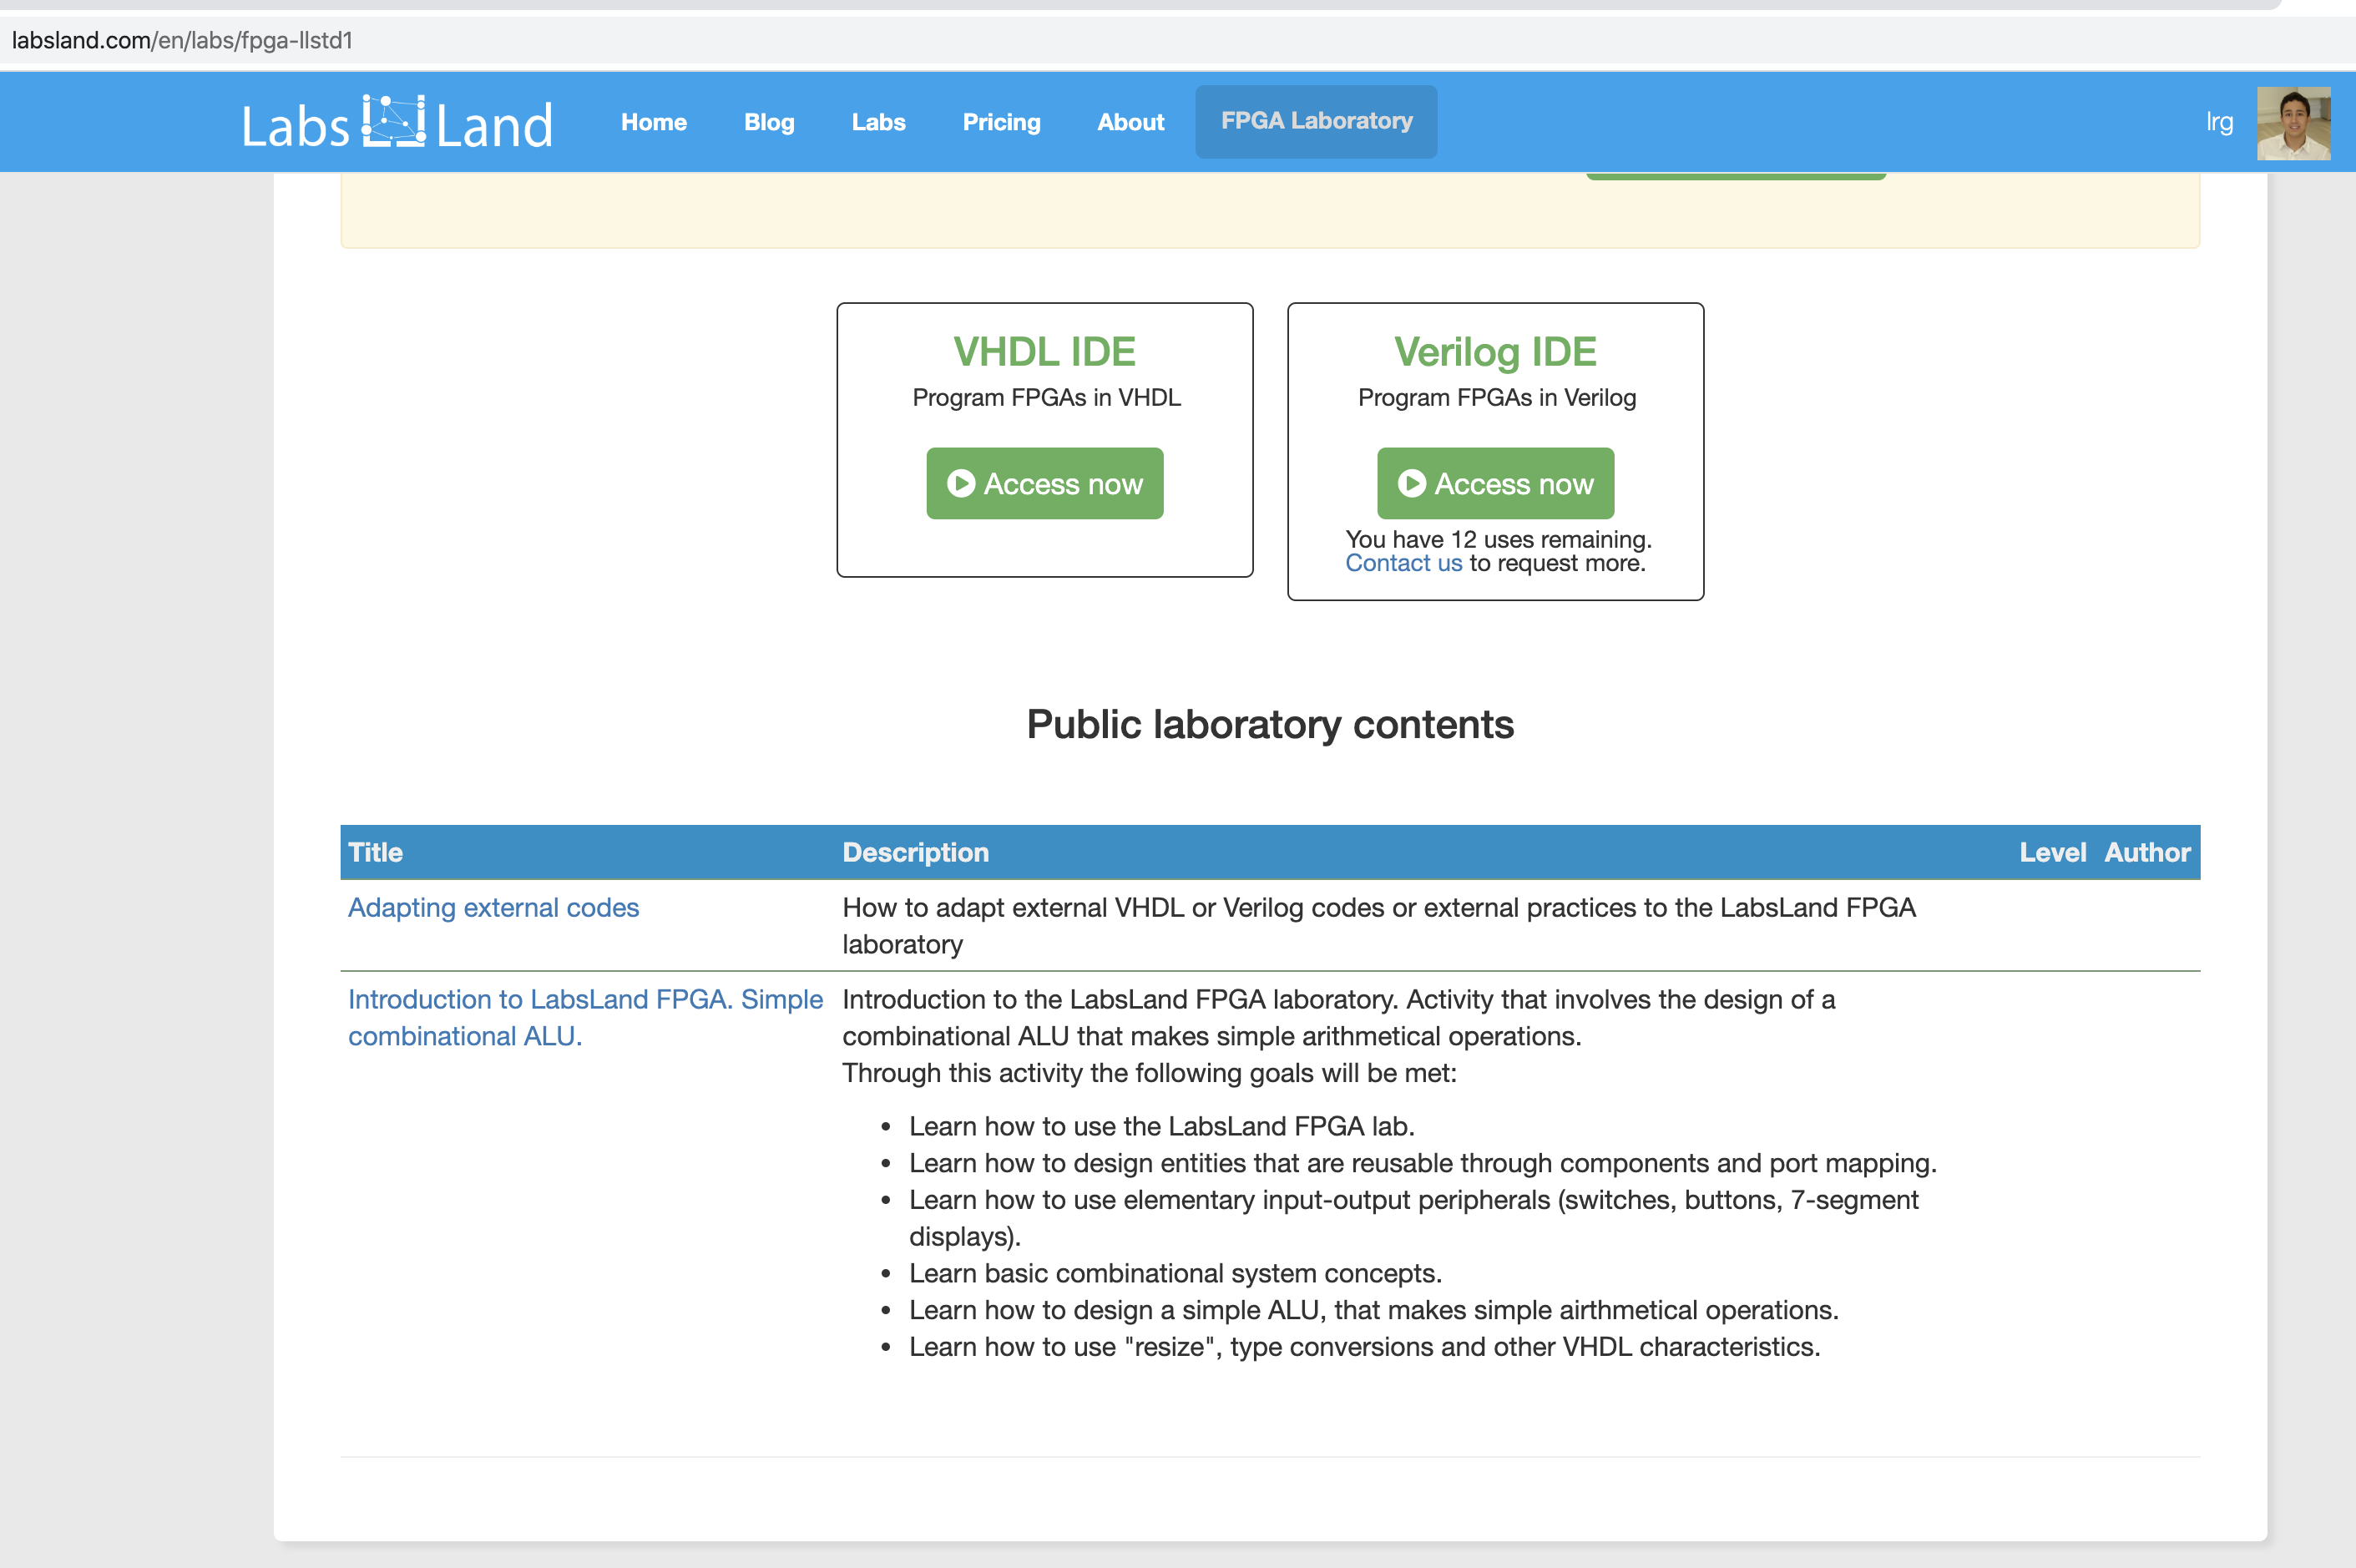
Some laboratories have pre-made activities and documentation available. You can check whether that’s the case for a given lab by going to the main website (https://labsland.com) and then to the lab you want. In Figure 8 you can see an example on the information page for a laboratory. The table that links to the pre-made activities and documentation that is available is in the lower half of the screen. You can click, for instance, in “Introduction to LabsLand FPGA. Simple combinational ALU.” to download the pre-made activity.
Moving on from here
Although this introduction is somewhat long, once you get the hang of it, adding laboratories to your activities is fast and straightforward. Students will simply have to click on a link that is fully integrated within their Google Classroom course, and they will get immediate access to a real laboratory, remotely.
Also, do not hesitate to contact us if you have any further questions, or if you simply want us to talk with you personally about the best way to get started in your school!